

Loop
Loop
Loop
Physical product design, Creative coding, Field research
Physical product design, Creative coding, Field research
Physical product design, Creative coding, Field research


Overview
Overview
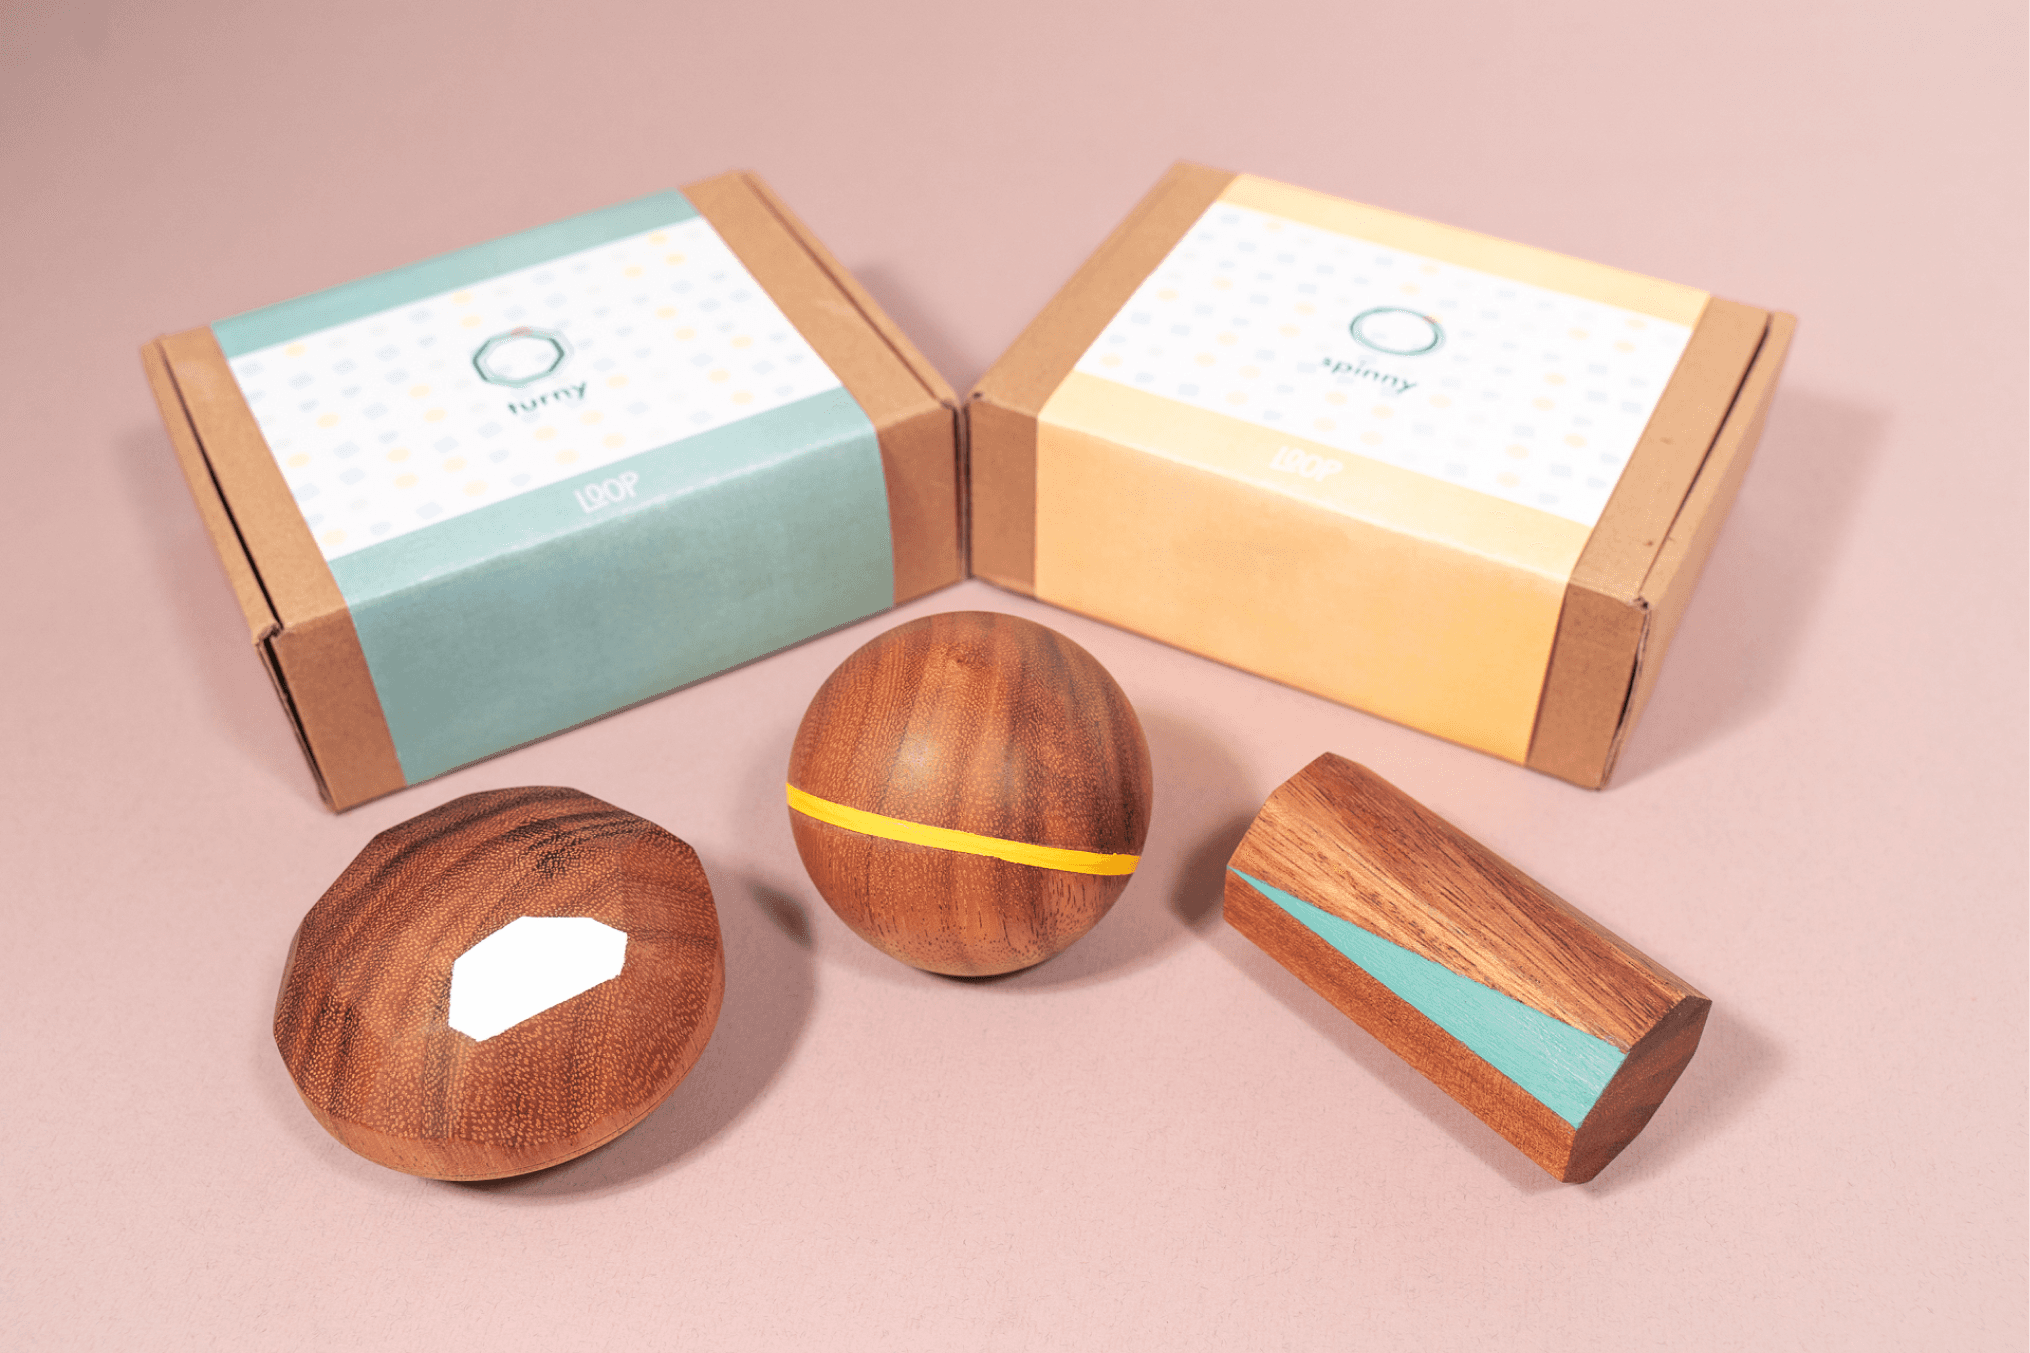
Loop is set of bespoke musical toys specifically designed for children with autism. Done as my final project at Copenhagen Institute of Interaction Design (CIID), the process involved extensive research and iterative prototyping to create a product that balances simplicity with therapeutic benefits. My goal was to develop a concept that would cater to the unique sensory and interaction needs of autistic children, offering them a meaningful and enjoyable experience.
Loop is set of bespoke musical toys specifically designed for children with autism. Done as my final project at Copenhagen Institute of Interaction Design (CIID), the process involved extensive research and iterative prototyping to create a product that balances simplicity with therapeutic benefits. My goal was to develop a concept that would cater to the unique sensory and interaction needs of autistic children, offering them a meaningful and enjoyable experience.
Loop is set of bespoke musical toys specifically designed for children with autism. Done as my final project at Copenhagen Institute of Interaction Design (CIID), the process involved extensive research and iterative prototyping to create a product that balances simplicity with therapeutic benefits. My goal was to develop a concept that would cater to the unique sensory and interaction needs of autistic children, offering them a meaningful and enjoyable experience.
Tools Used
Figma
Design Tool

After Effects
Animations

Premier Pro
Vidoe Editing

p5.js
Creative Coding

Arduino
Hardware
Tools Used

Figma
Design Tool

After Effects
Animations

Premier Pro
Vidoe Editing

p5.js
Creative Coding

Arduino
Hardware
Tools Used

Figma
Design Tool

After Effects
Animations

Premier Pro
Vidoe Editing

p5.js
Creative Coding

Arduino
Hardware
Tools Used

Figma
Design Tool

After Effects
Animations

Premier Pro
Vidoe Editing

p5.js
Creative Coding

Arduino
Hardware
Created
Created
2020


Process
Process
Research
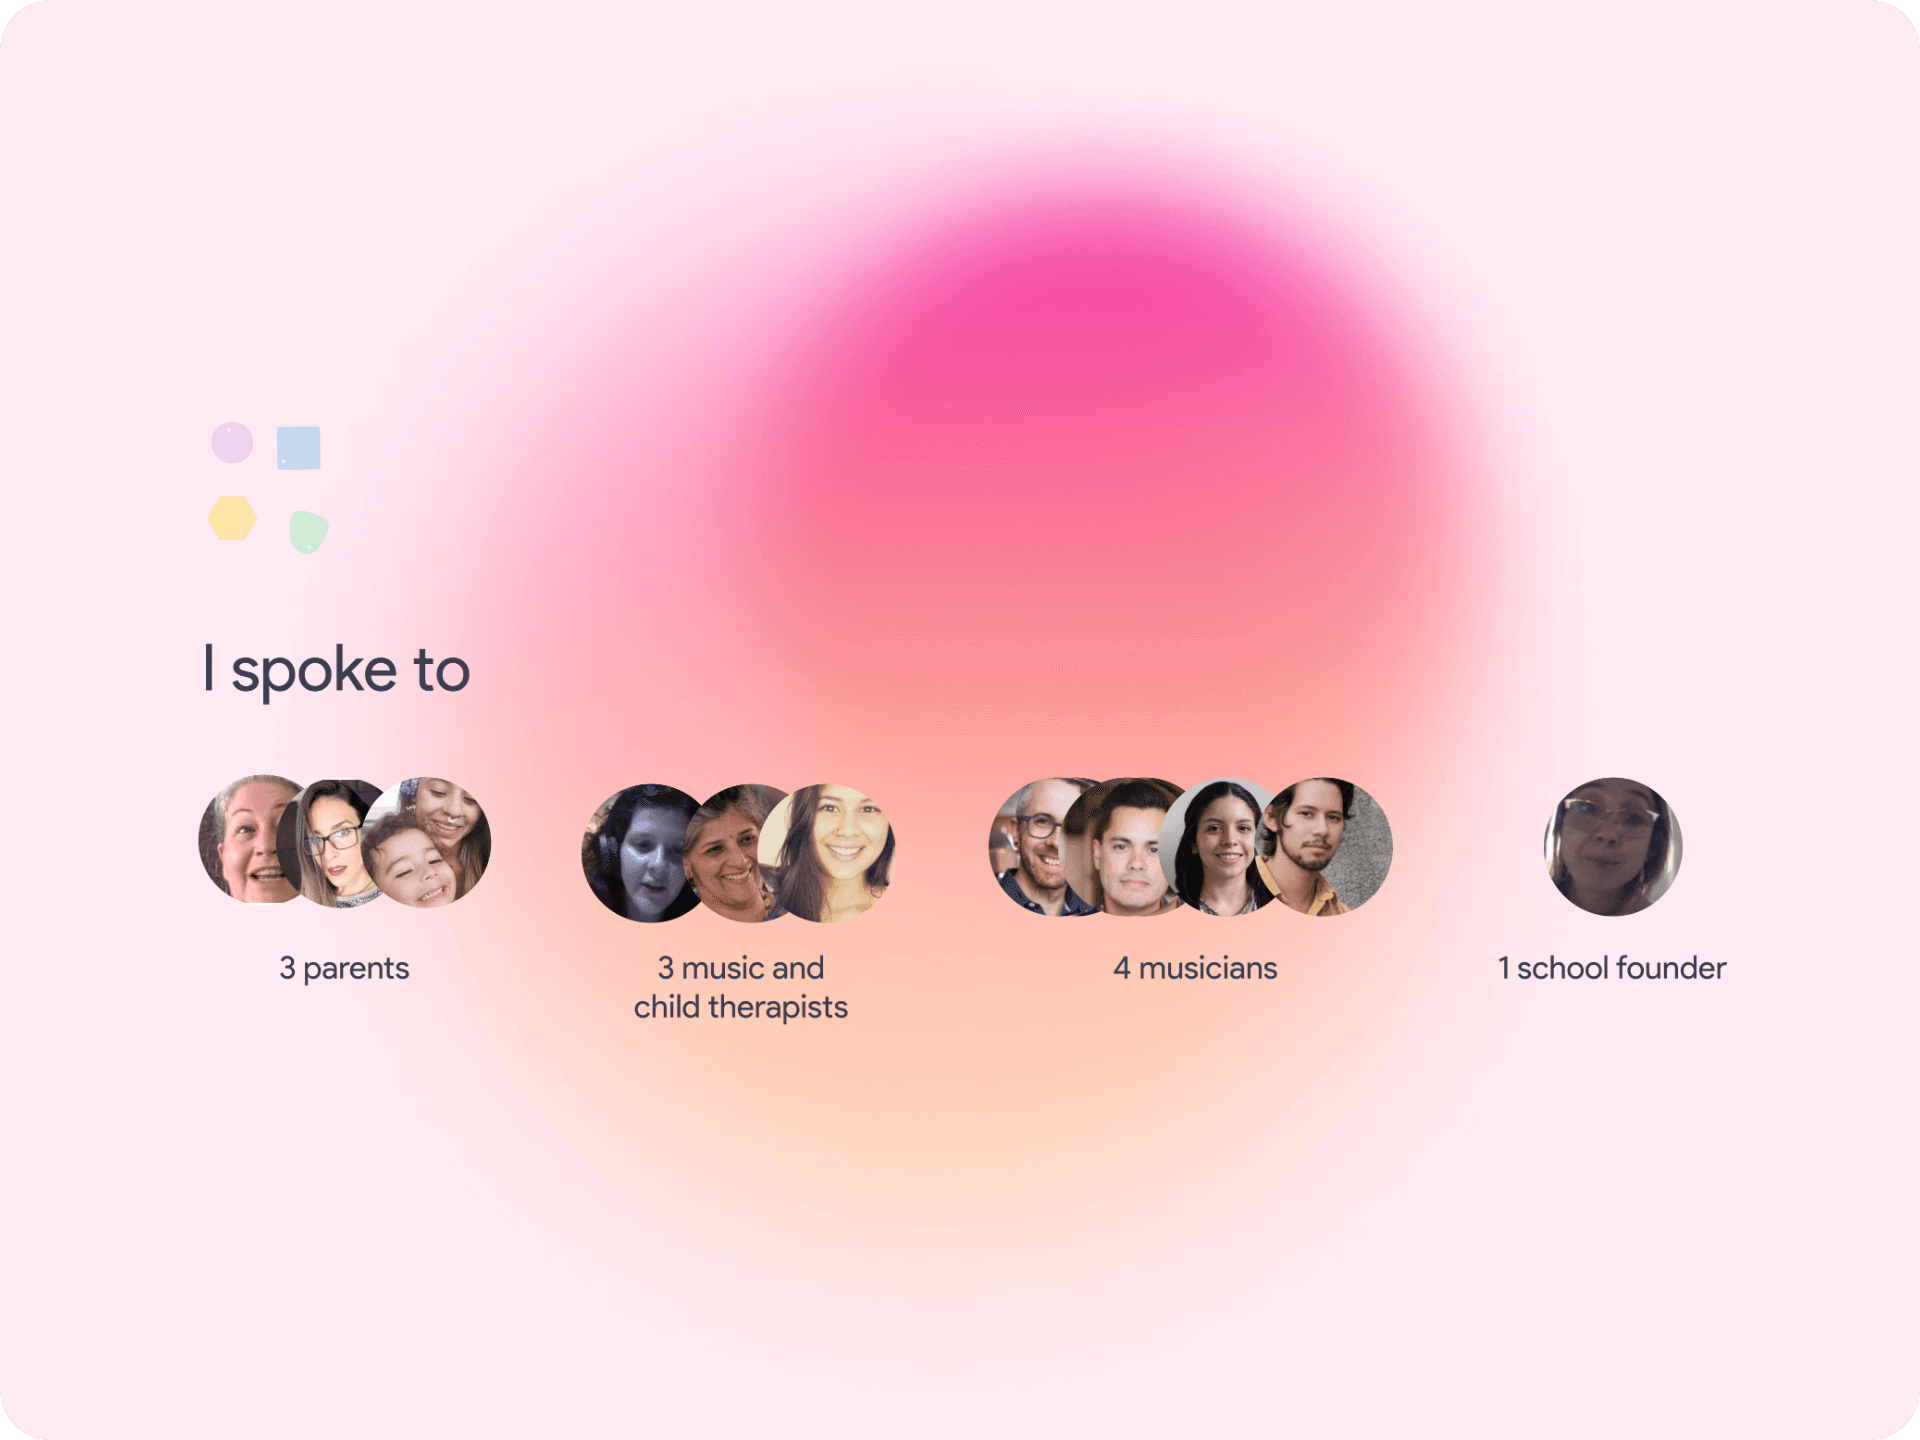
The first step in this project was immersing myself in learning about the needs of children with autism. I spoke with parents, musicians, and therapists to gain a well-rounded understanding of the subject. These conversations were instrumental in shaping my approach, providing insights into the textures, sounds, and interaction preferences that would be essential for the toy.
In addition to these interviews, I also spent time reading research papers and books on autism, sensory processing, and child development. This research helped me frame the problem and identify potential solutions that could guide my design process.
Mentorship
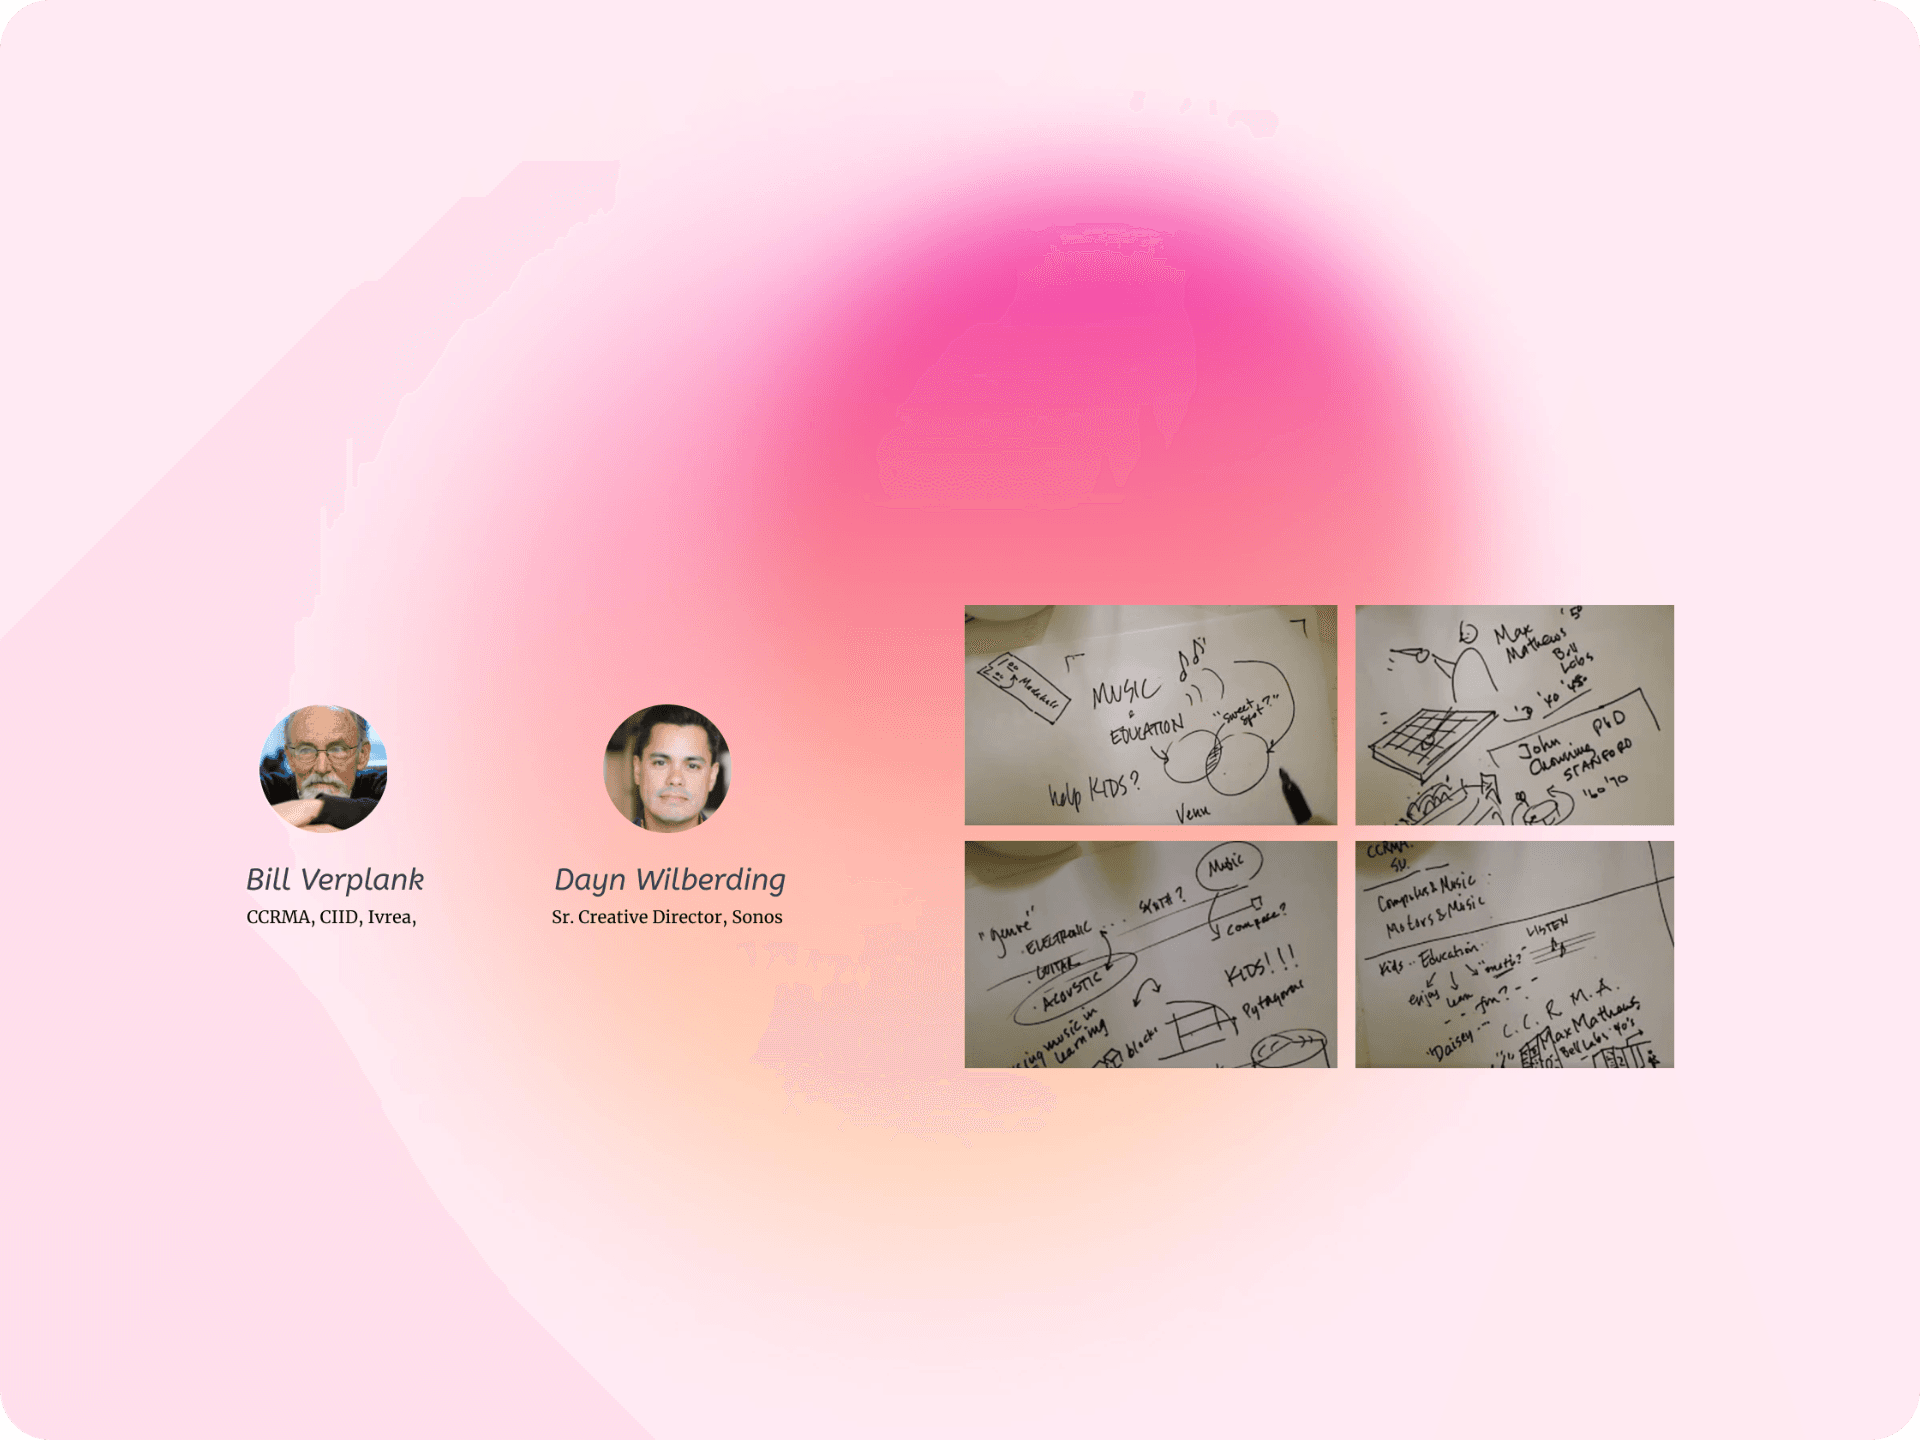
I was fortunate to receive mentorship from Bill Verplank, a pioneer in interaction design. His guidance throughout the project was invaluable, particularly in understanding the interplay between music, movement and user interaction. Bill’s experience helped me shape the conceptual foundation of Loop.
In addition, I received crucial advice from Dayn Wilberding, then a Senior Creative Director at Sonos. Dayn shared his expertise in audio, tactility, generative music, and haptics, which played a key role in ensuring that the toy would be both engaging and functional for children with autism.
Playfulness with a therapeutic output
Co-Creation
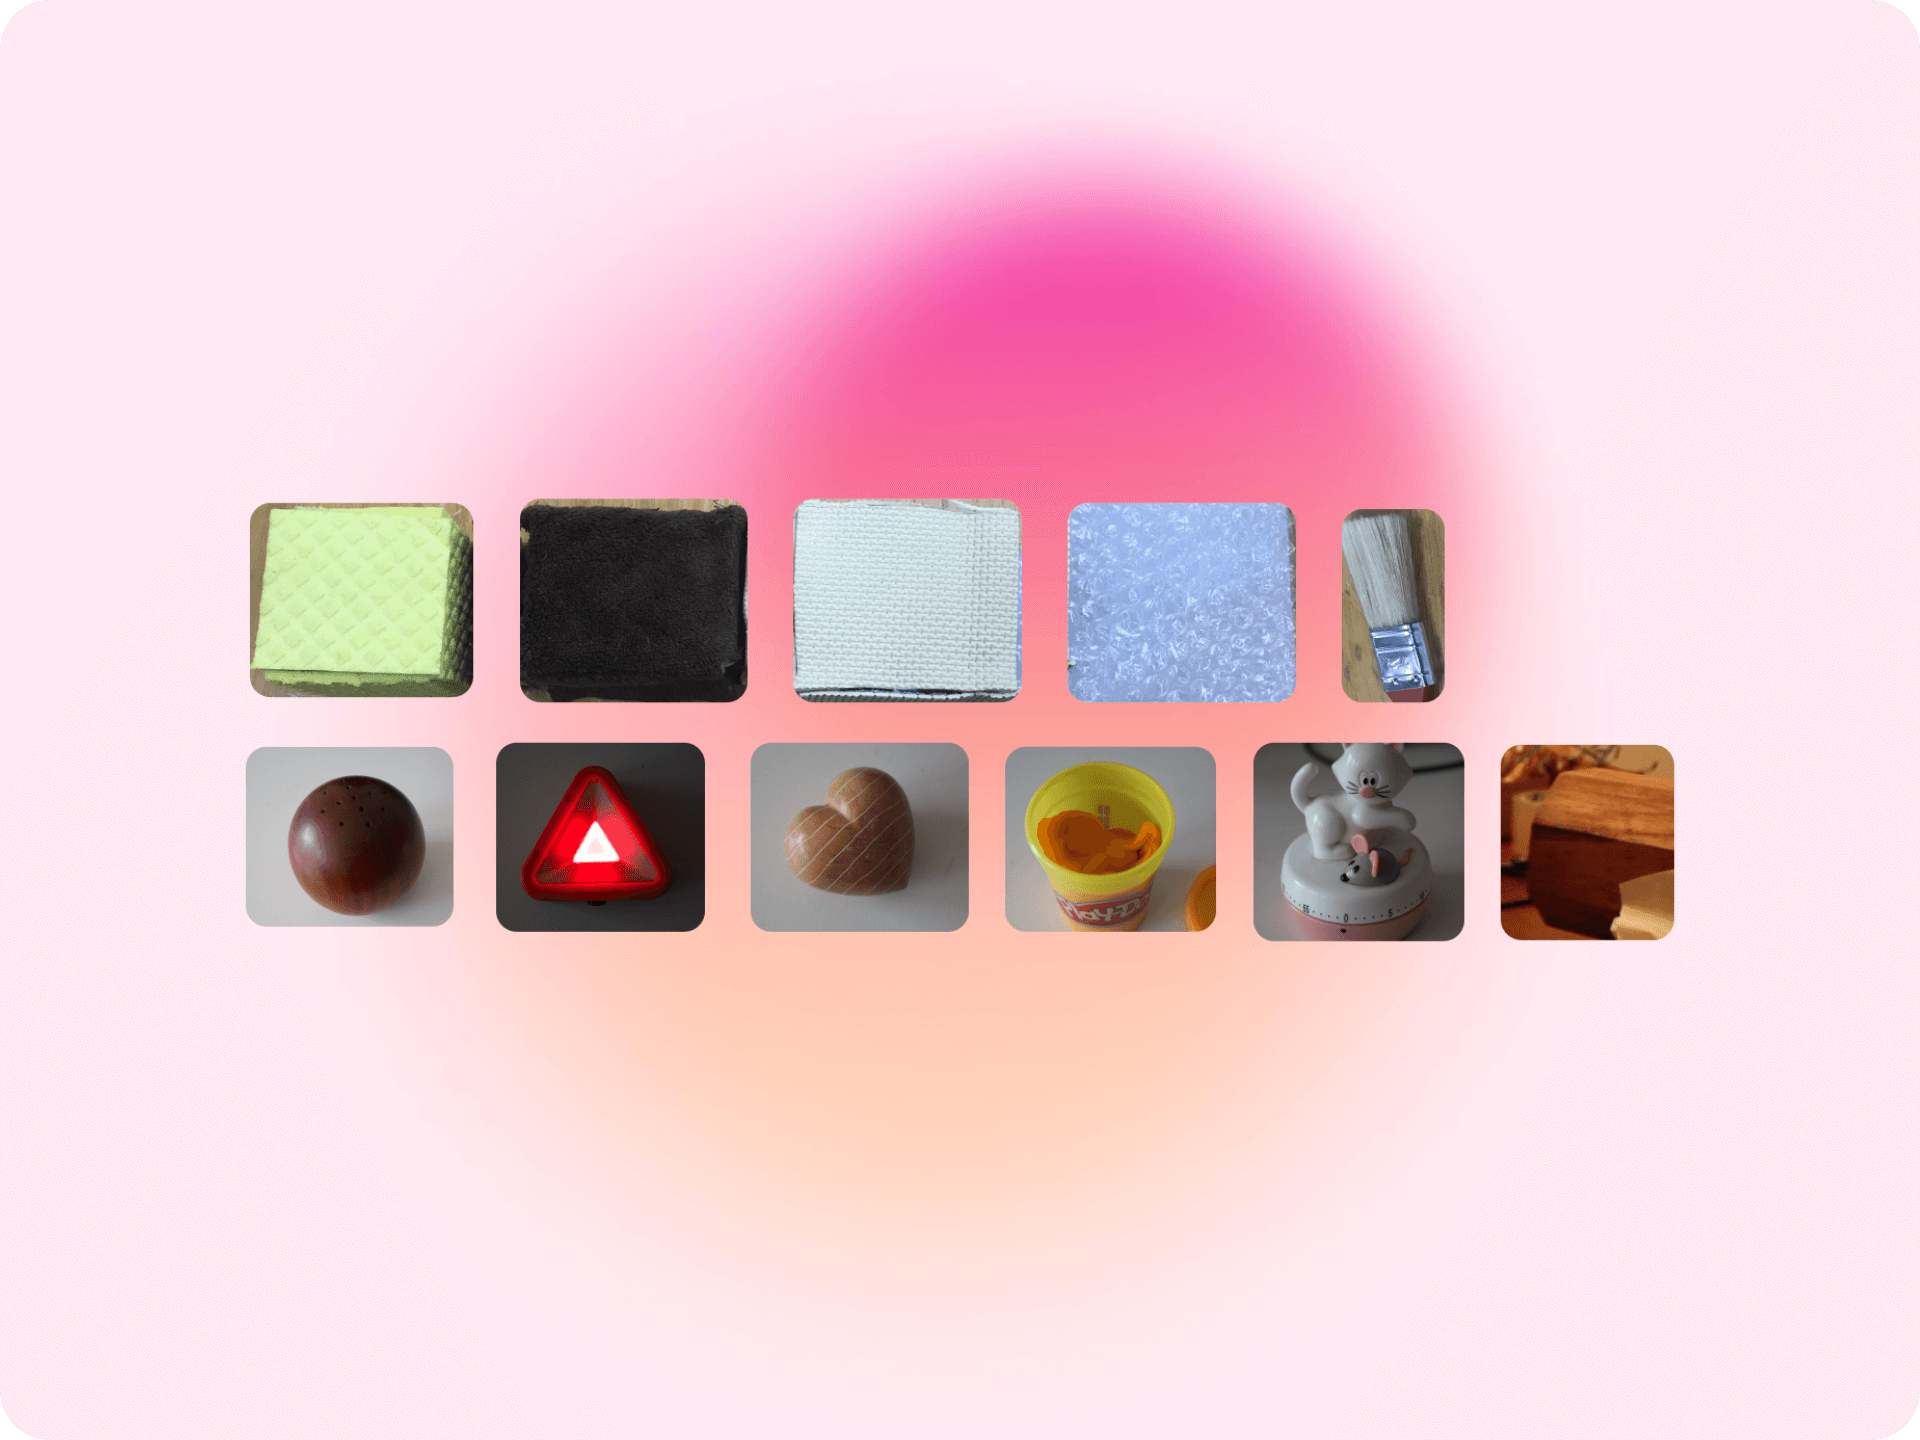
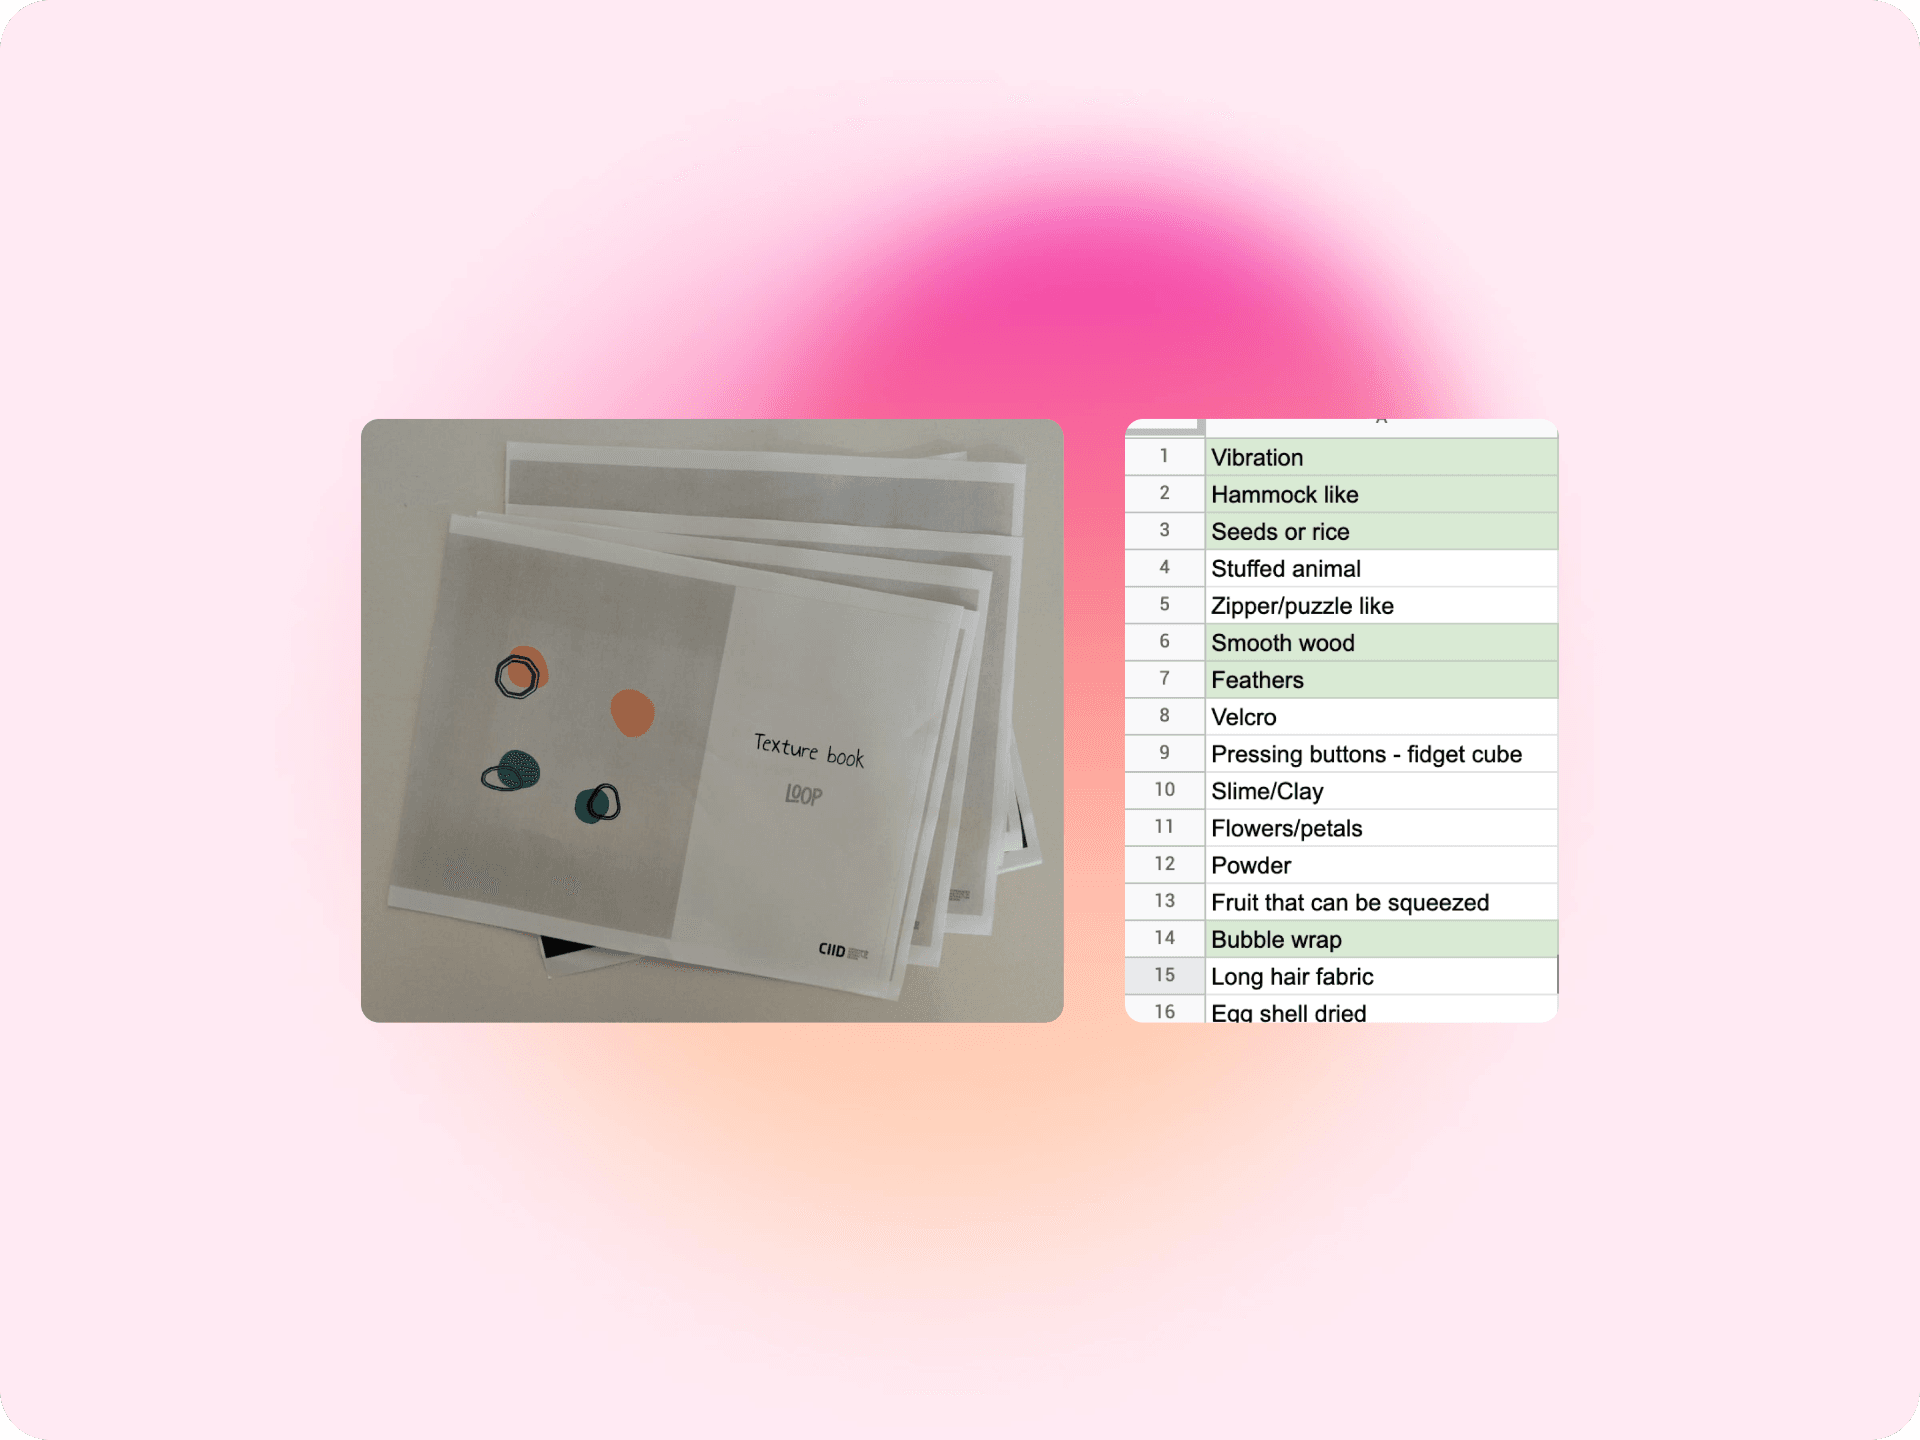
Co-creation was at the heart of Loop’s development. I started by organizing initial rounds of co-creation sessions to understand which textures, shapes, and sounds would resonate most with children with autism. It became clear early on that the toy needed to be uncomplicated, with a focus on the child's preferences and needs.
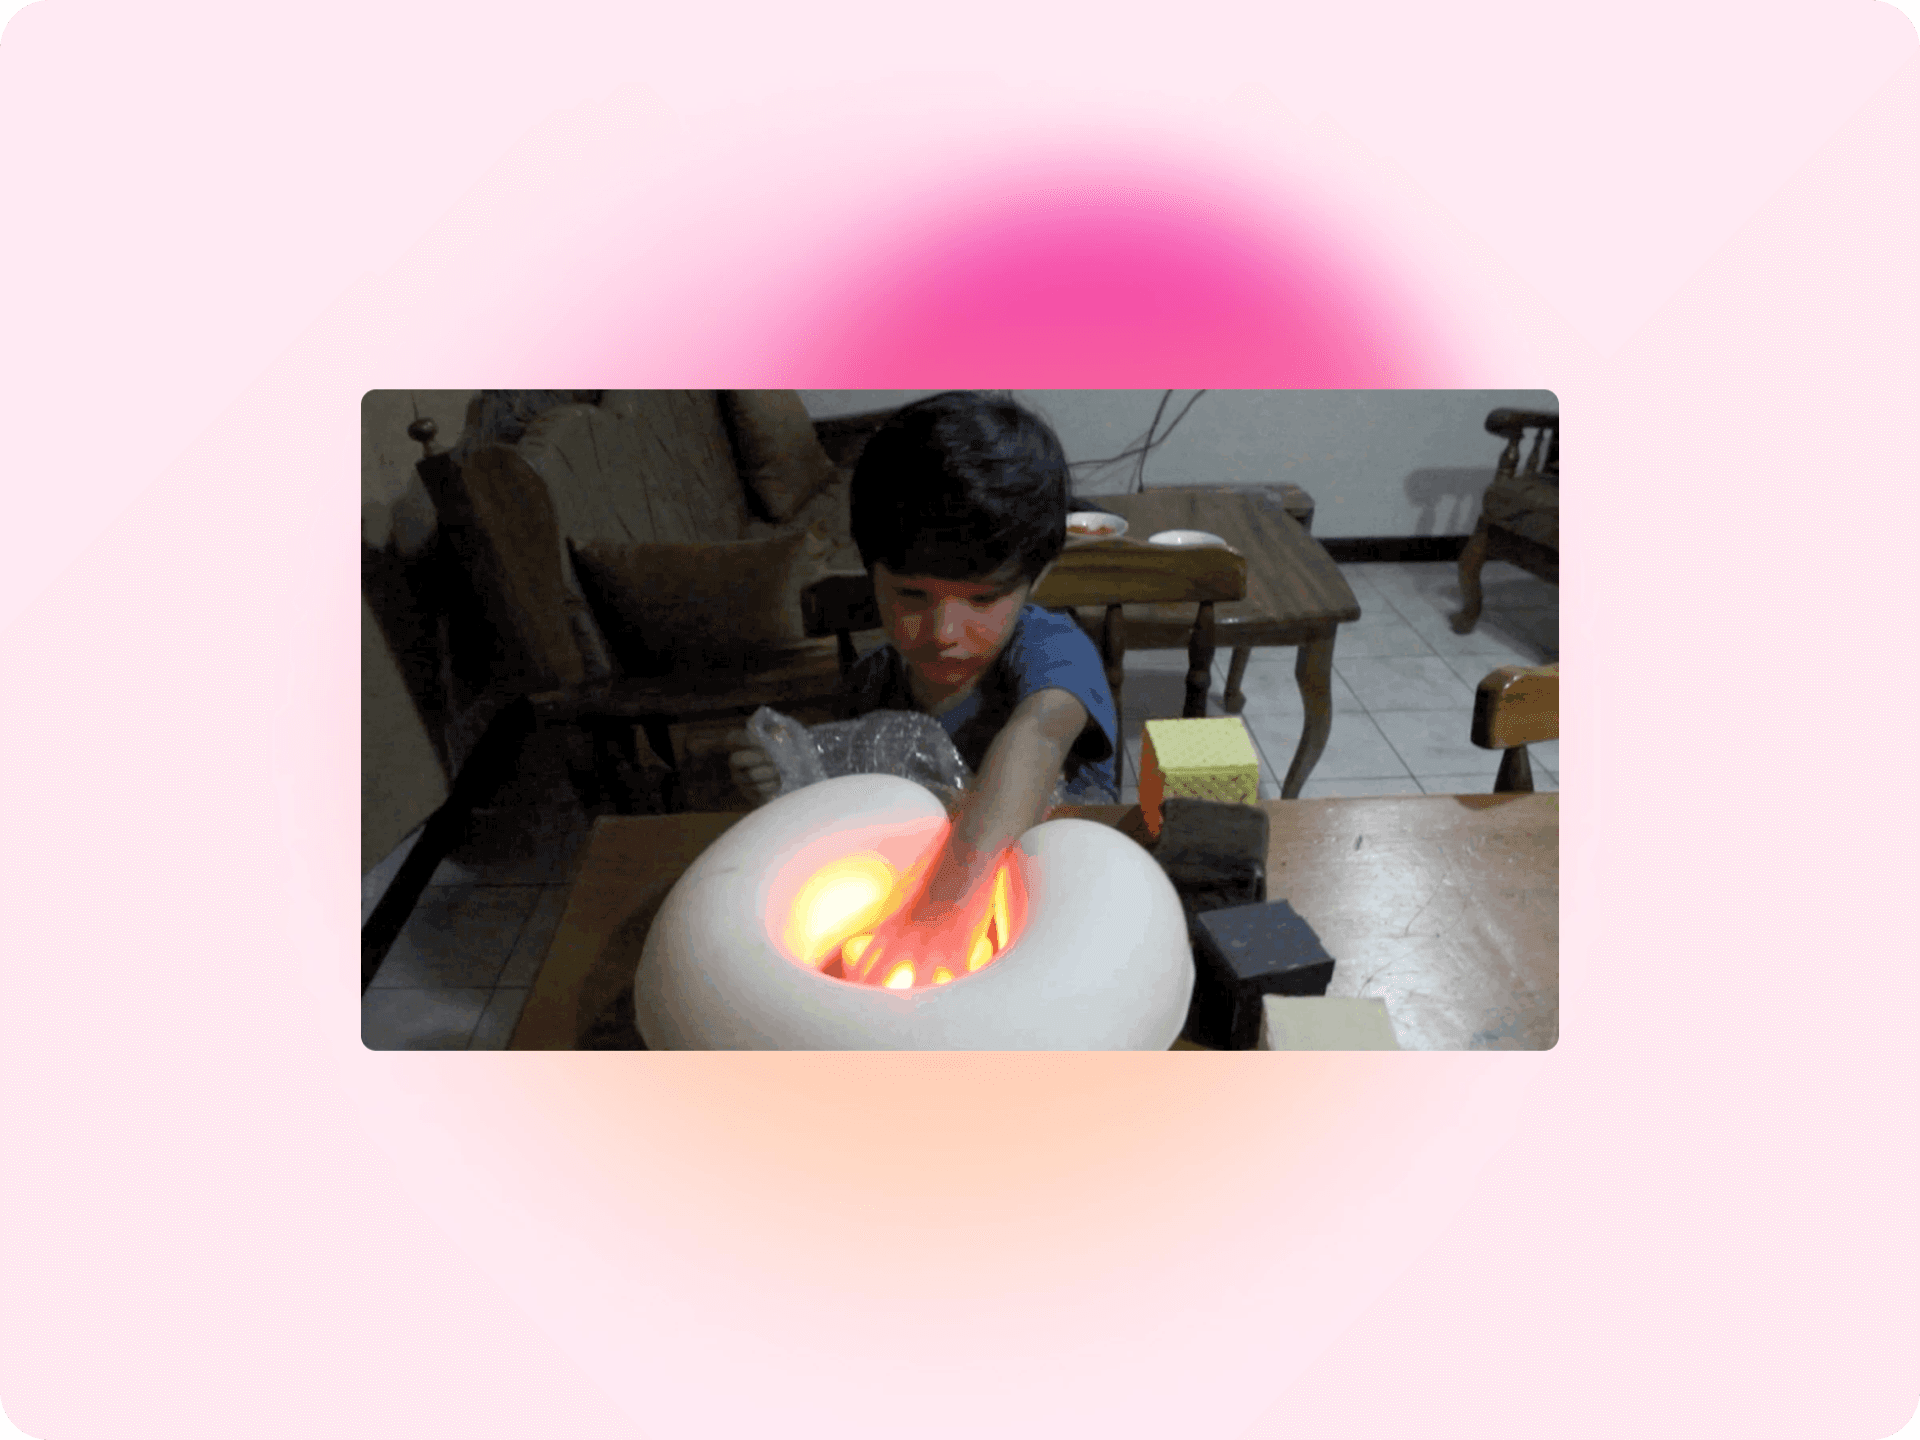
In each session, I introduced various prototypes to see how Julian (the participant) interacted with them. These observations were critical as they allowed me to iterate on the designs, either adding complexity or simplifying elements based on the feedback. After multiple rounds of testing, I realized that a musical toy for children with autism works best when it is simple and tailored to each child’s unique needs.
Exploring music softwares
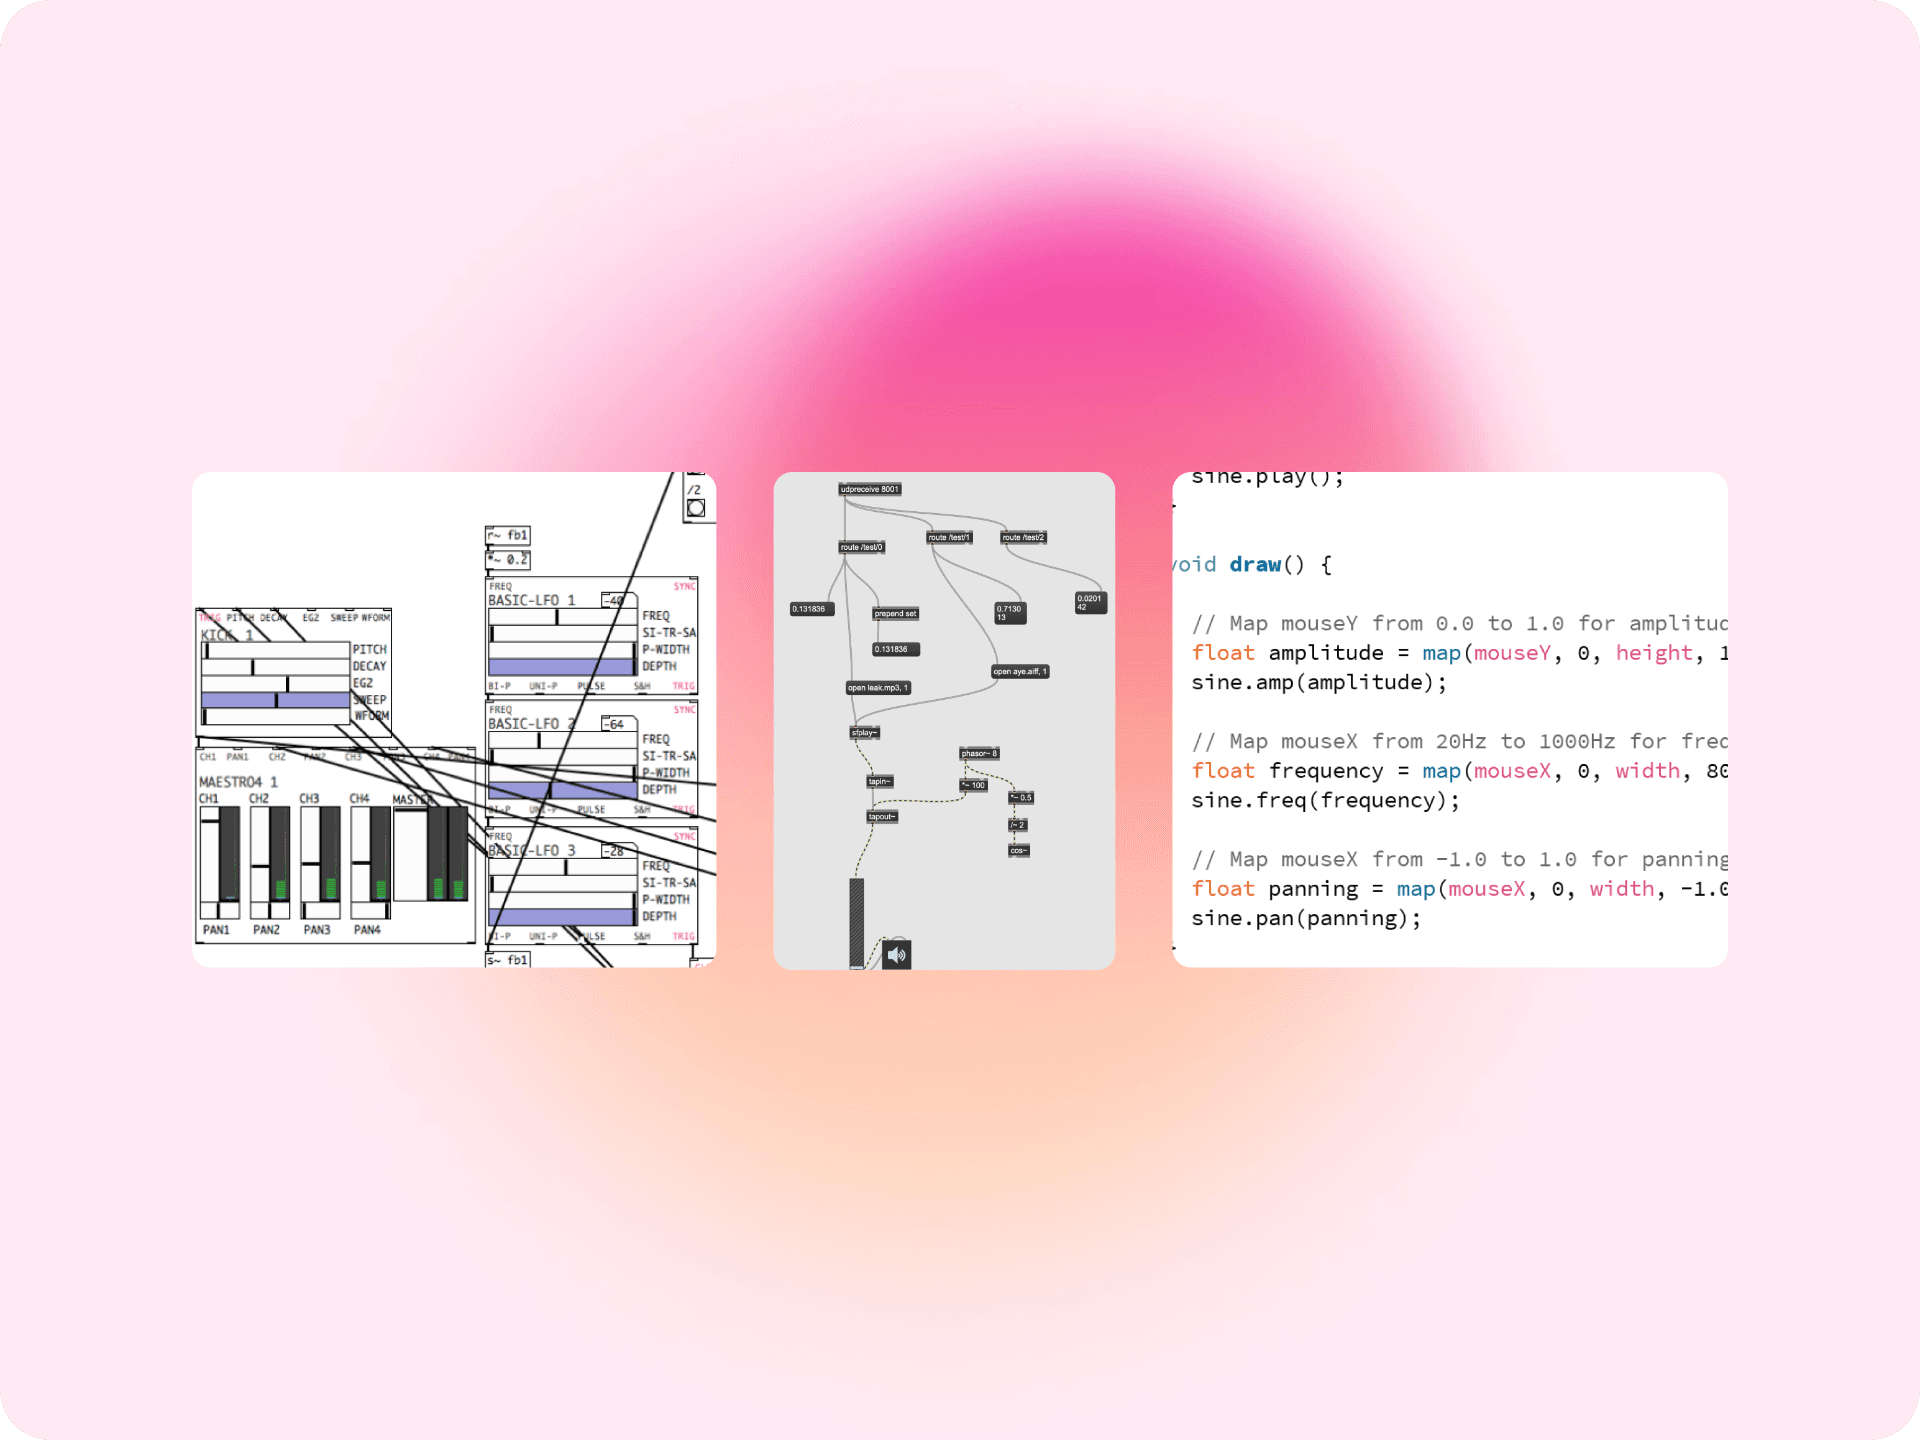
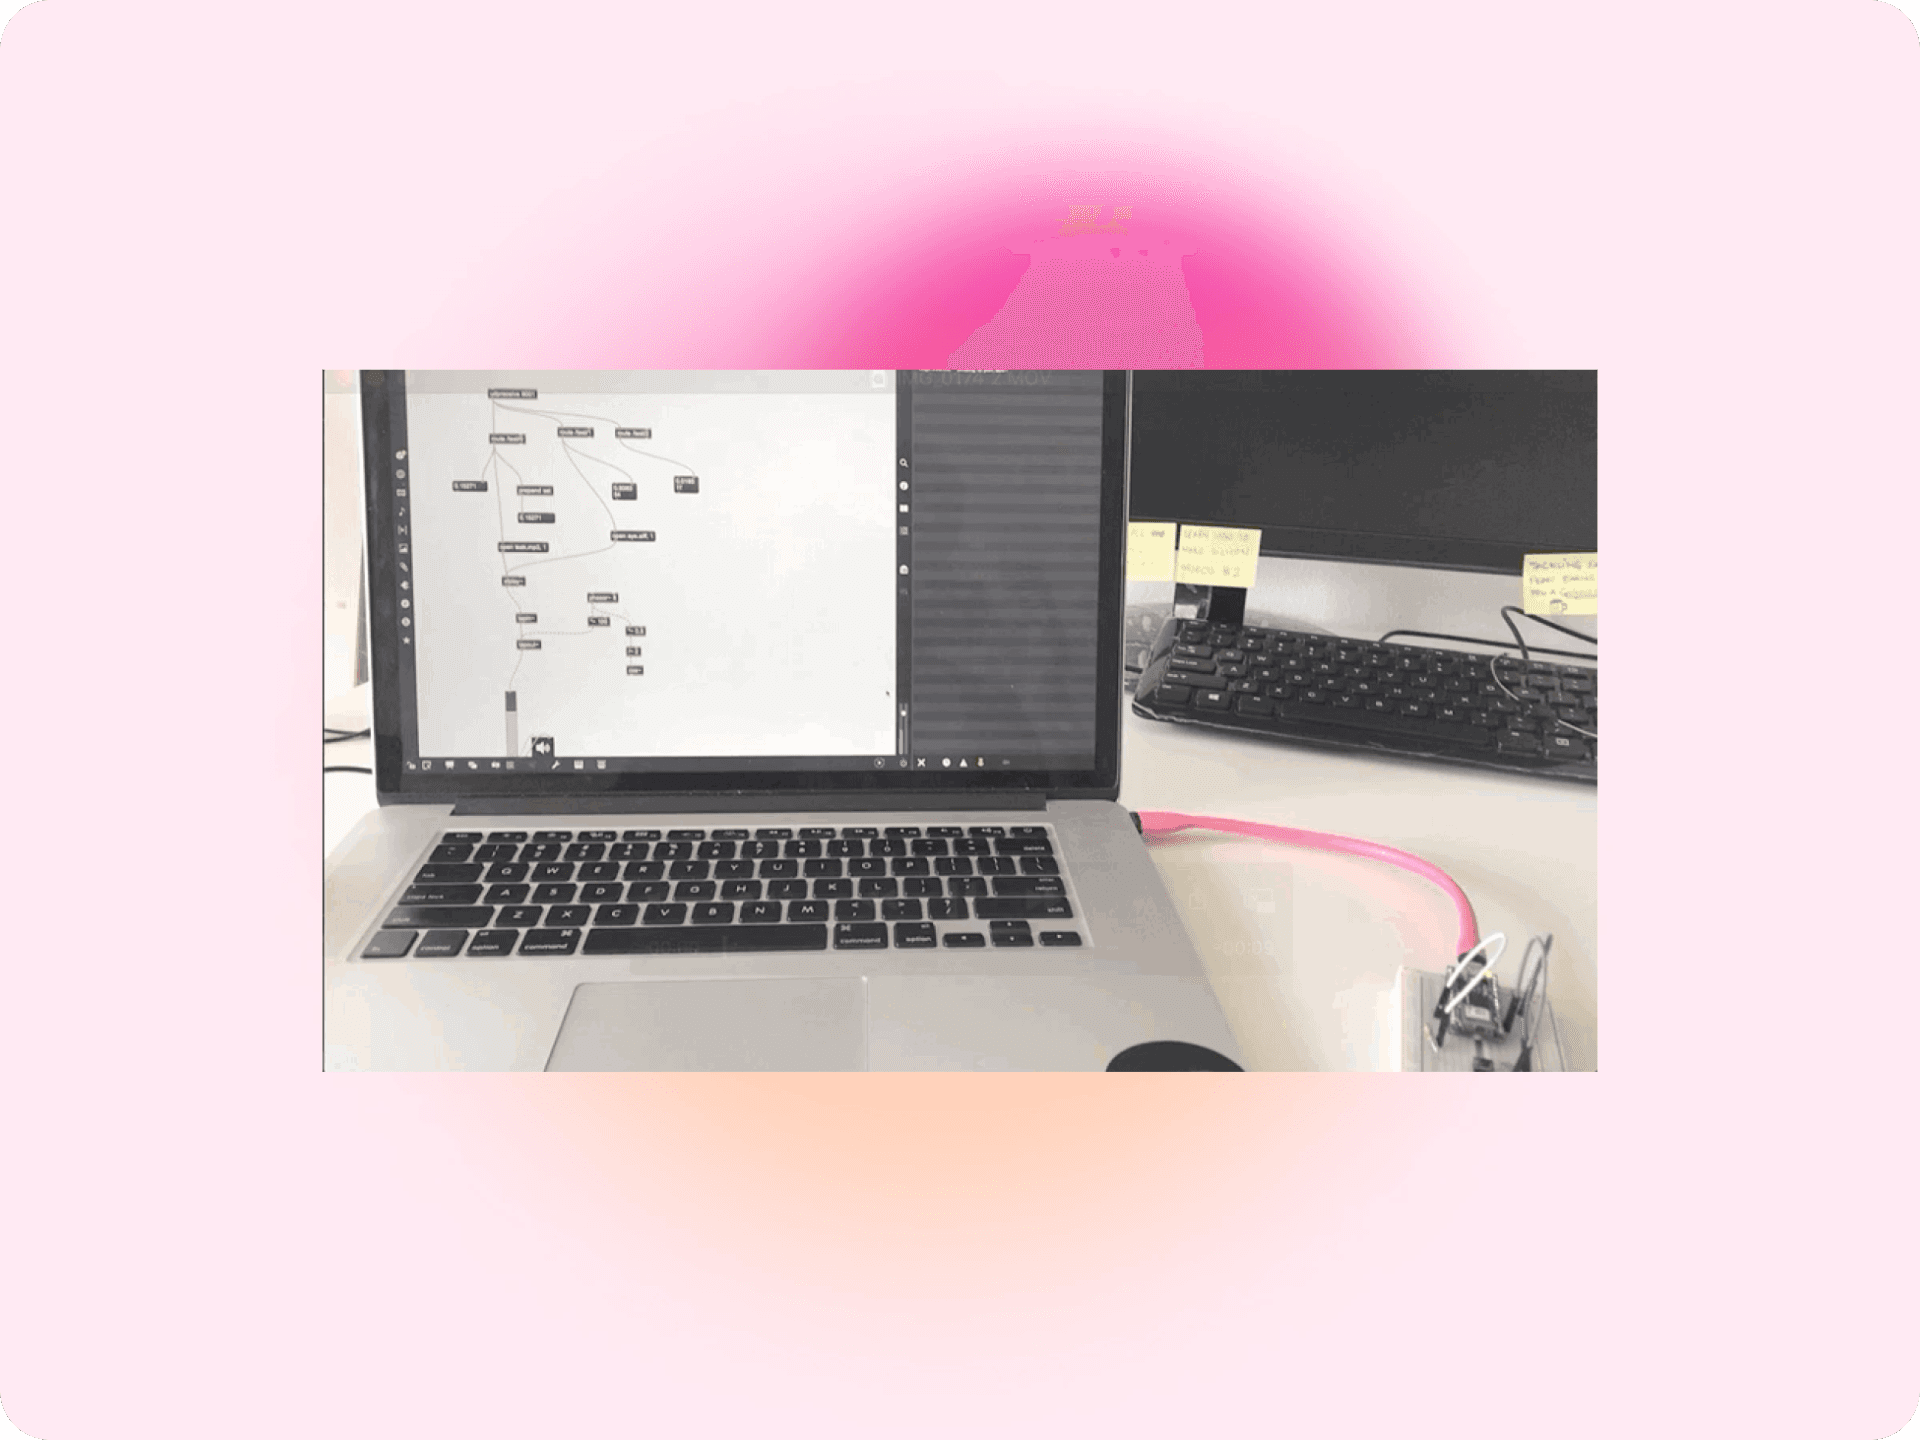
In the early stages, I explored several music software tools like PureData, Max, and Processing for prototype development. However, I quickly realized that I was spending too much time learning the software and not enough time creating the actual music and refining the toy.
This realization led me to switch to p5.js, a simpler and more intuitive tool that allowed me to iterate and test more efficiently.
Prototyping with Everyday Objects
During early prototype testing, I discovered that simple, everyday objects found in my kitchen were more effective at capturing children’s attention than complex shapes. I used items like salt shakers, spoons, and cups to test the interactive elements of the toy. These objects were familiar and provided the right balance of simplicity and engagement.
Iteration & Testing
Initial Iterations:
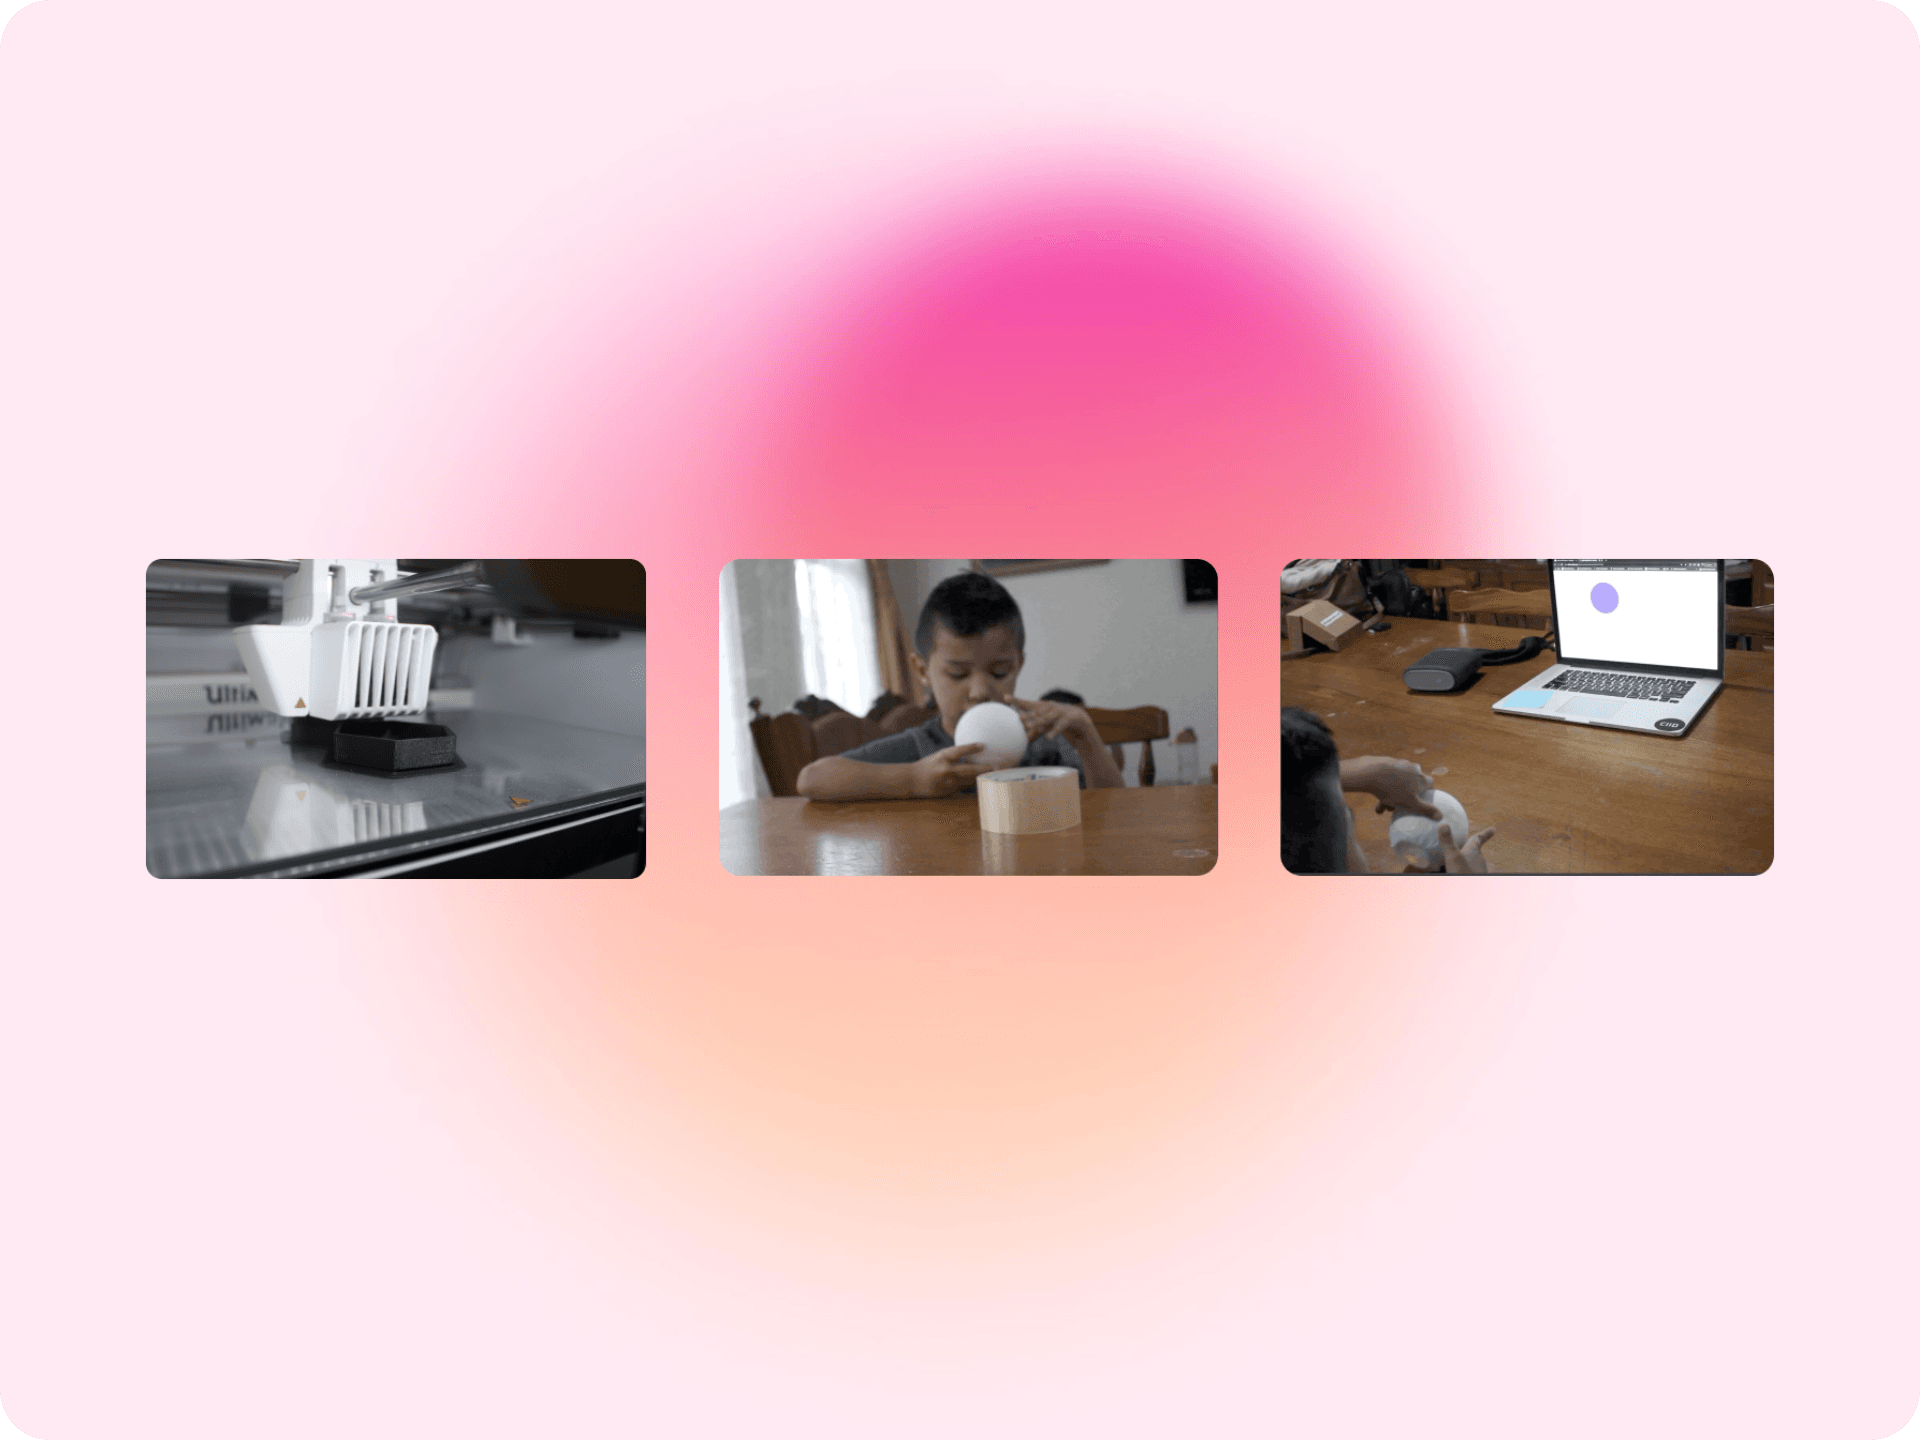
One of my testing rounds involved introducing a screen as part of the prototype. However, this iteration failed, as the participant (Julian, 5 years old) was more interested in the screen than in interacting with the toy itself. This experience was a turning point that convinced me to avoid screens and focus instead on tactile and auditory interaction.
3D Printing Colorful Toys:
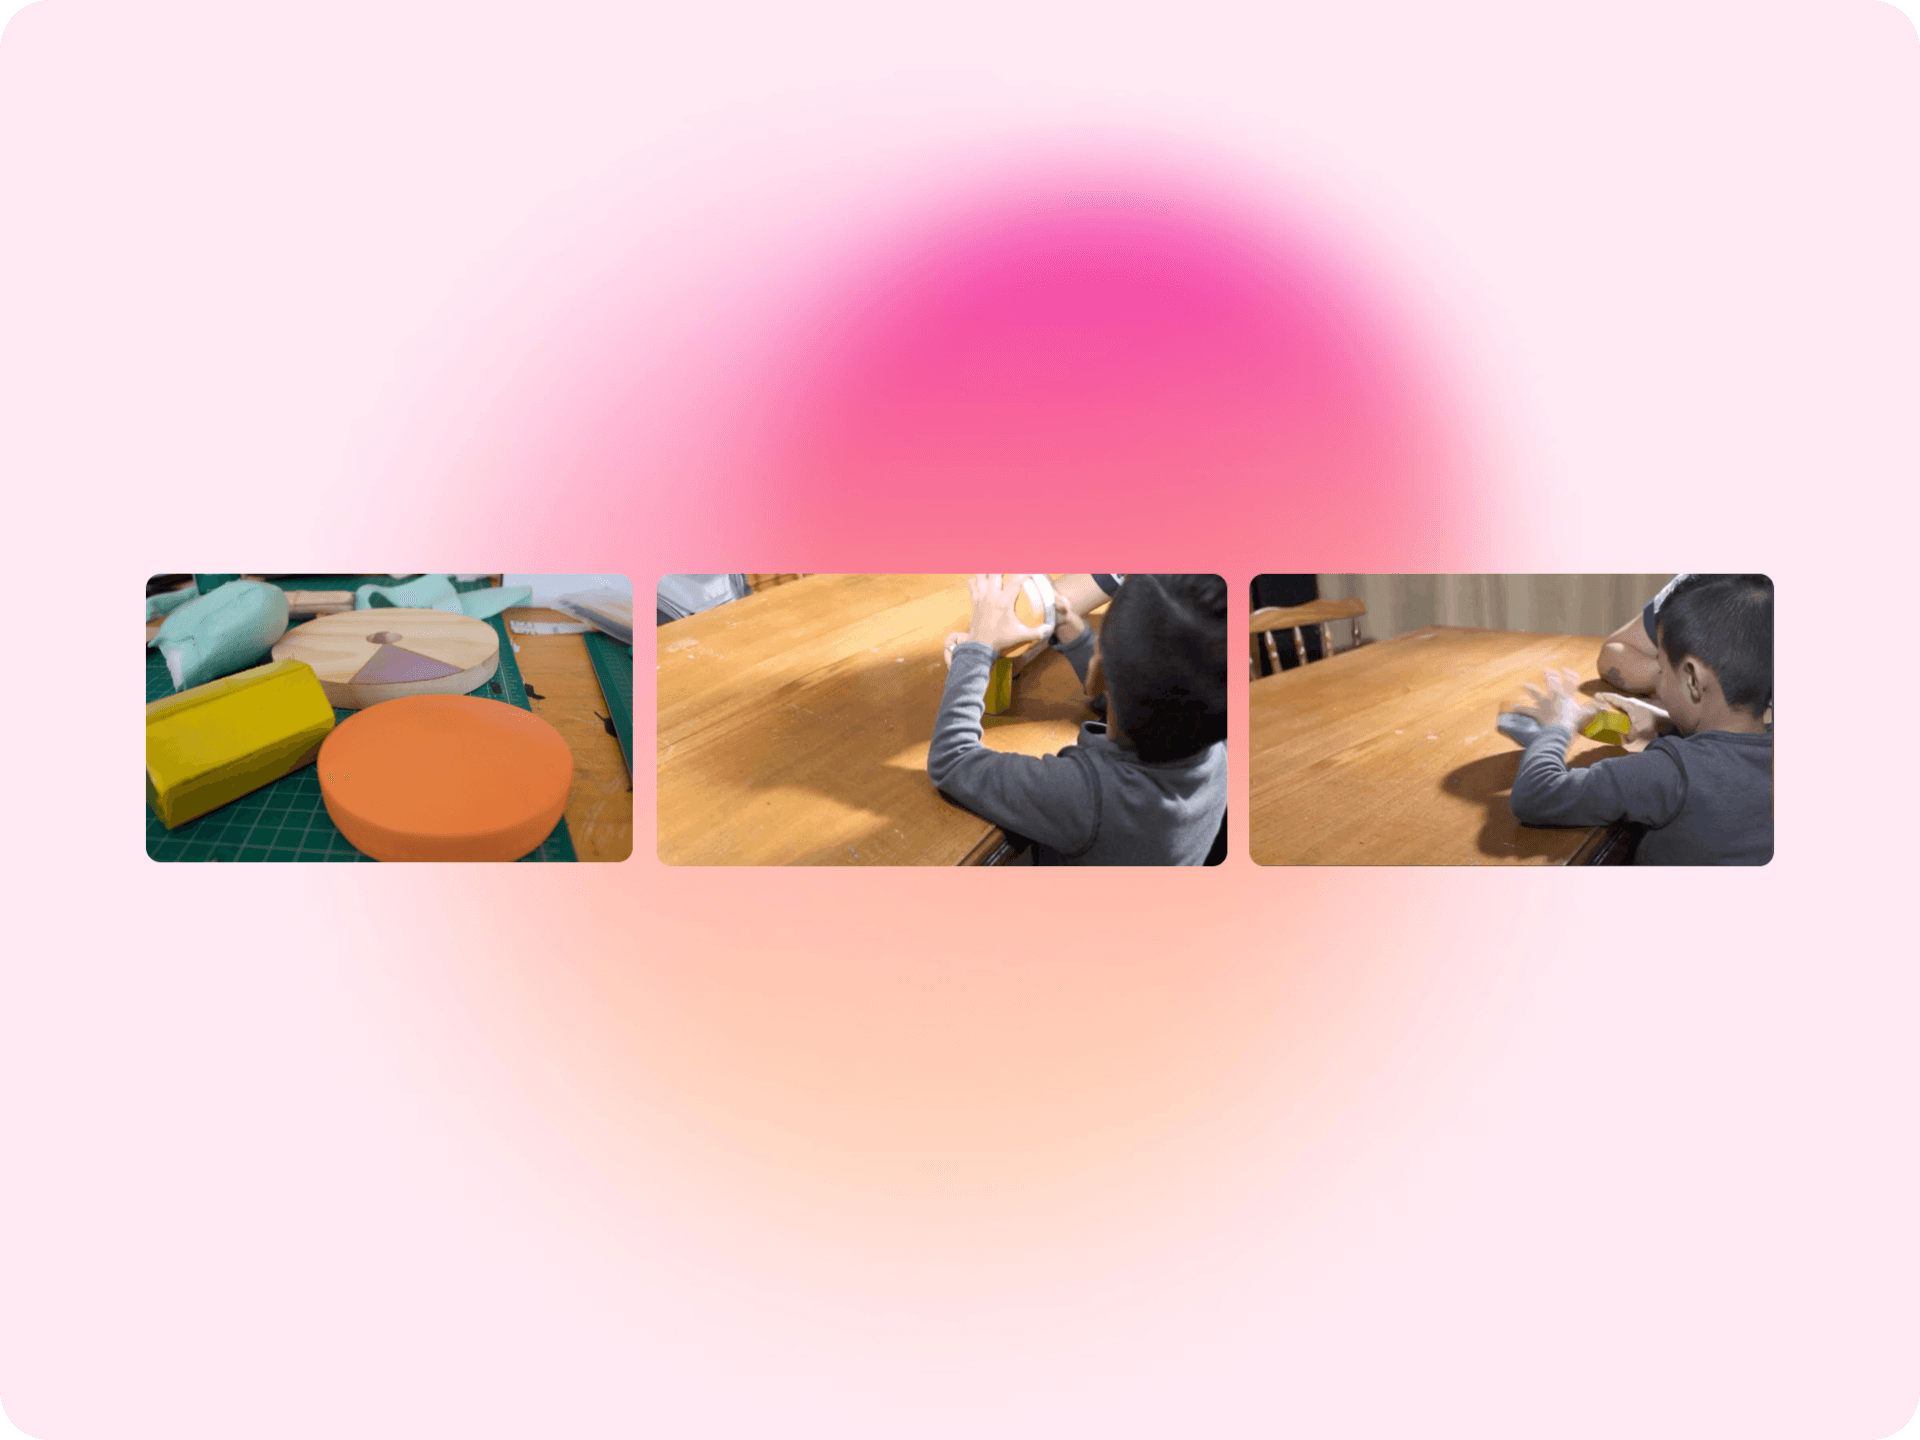
Another iteration involved using 3D printing to create colorful toys. Although these toys looked playful and appealing, they lacked the durability needed for rough play, which is a critical consideration when designing toys for children. This led me to explore more robust materials.
Back to Basics
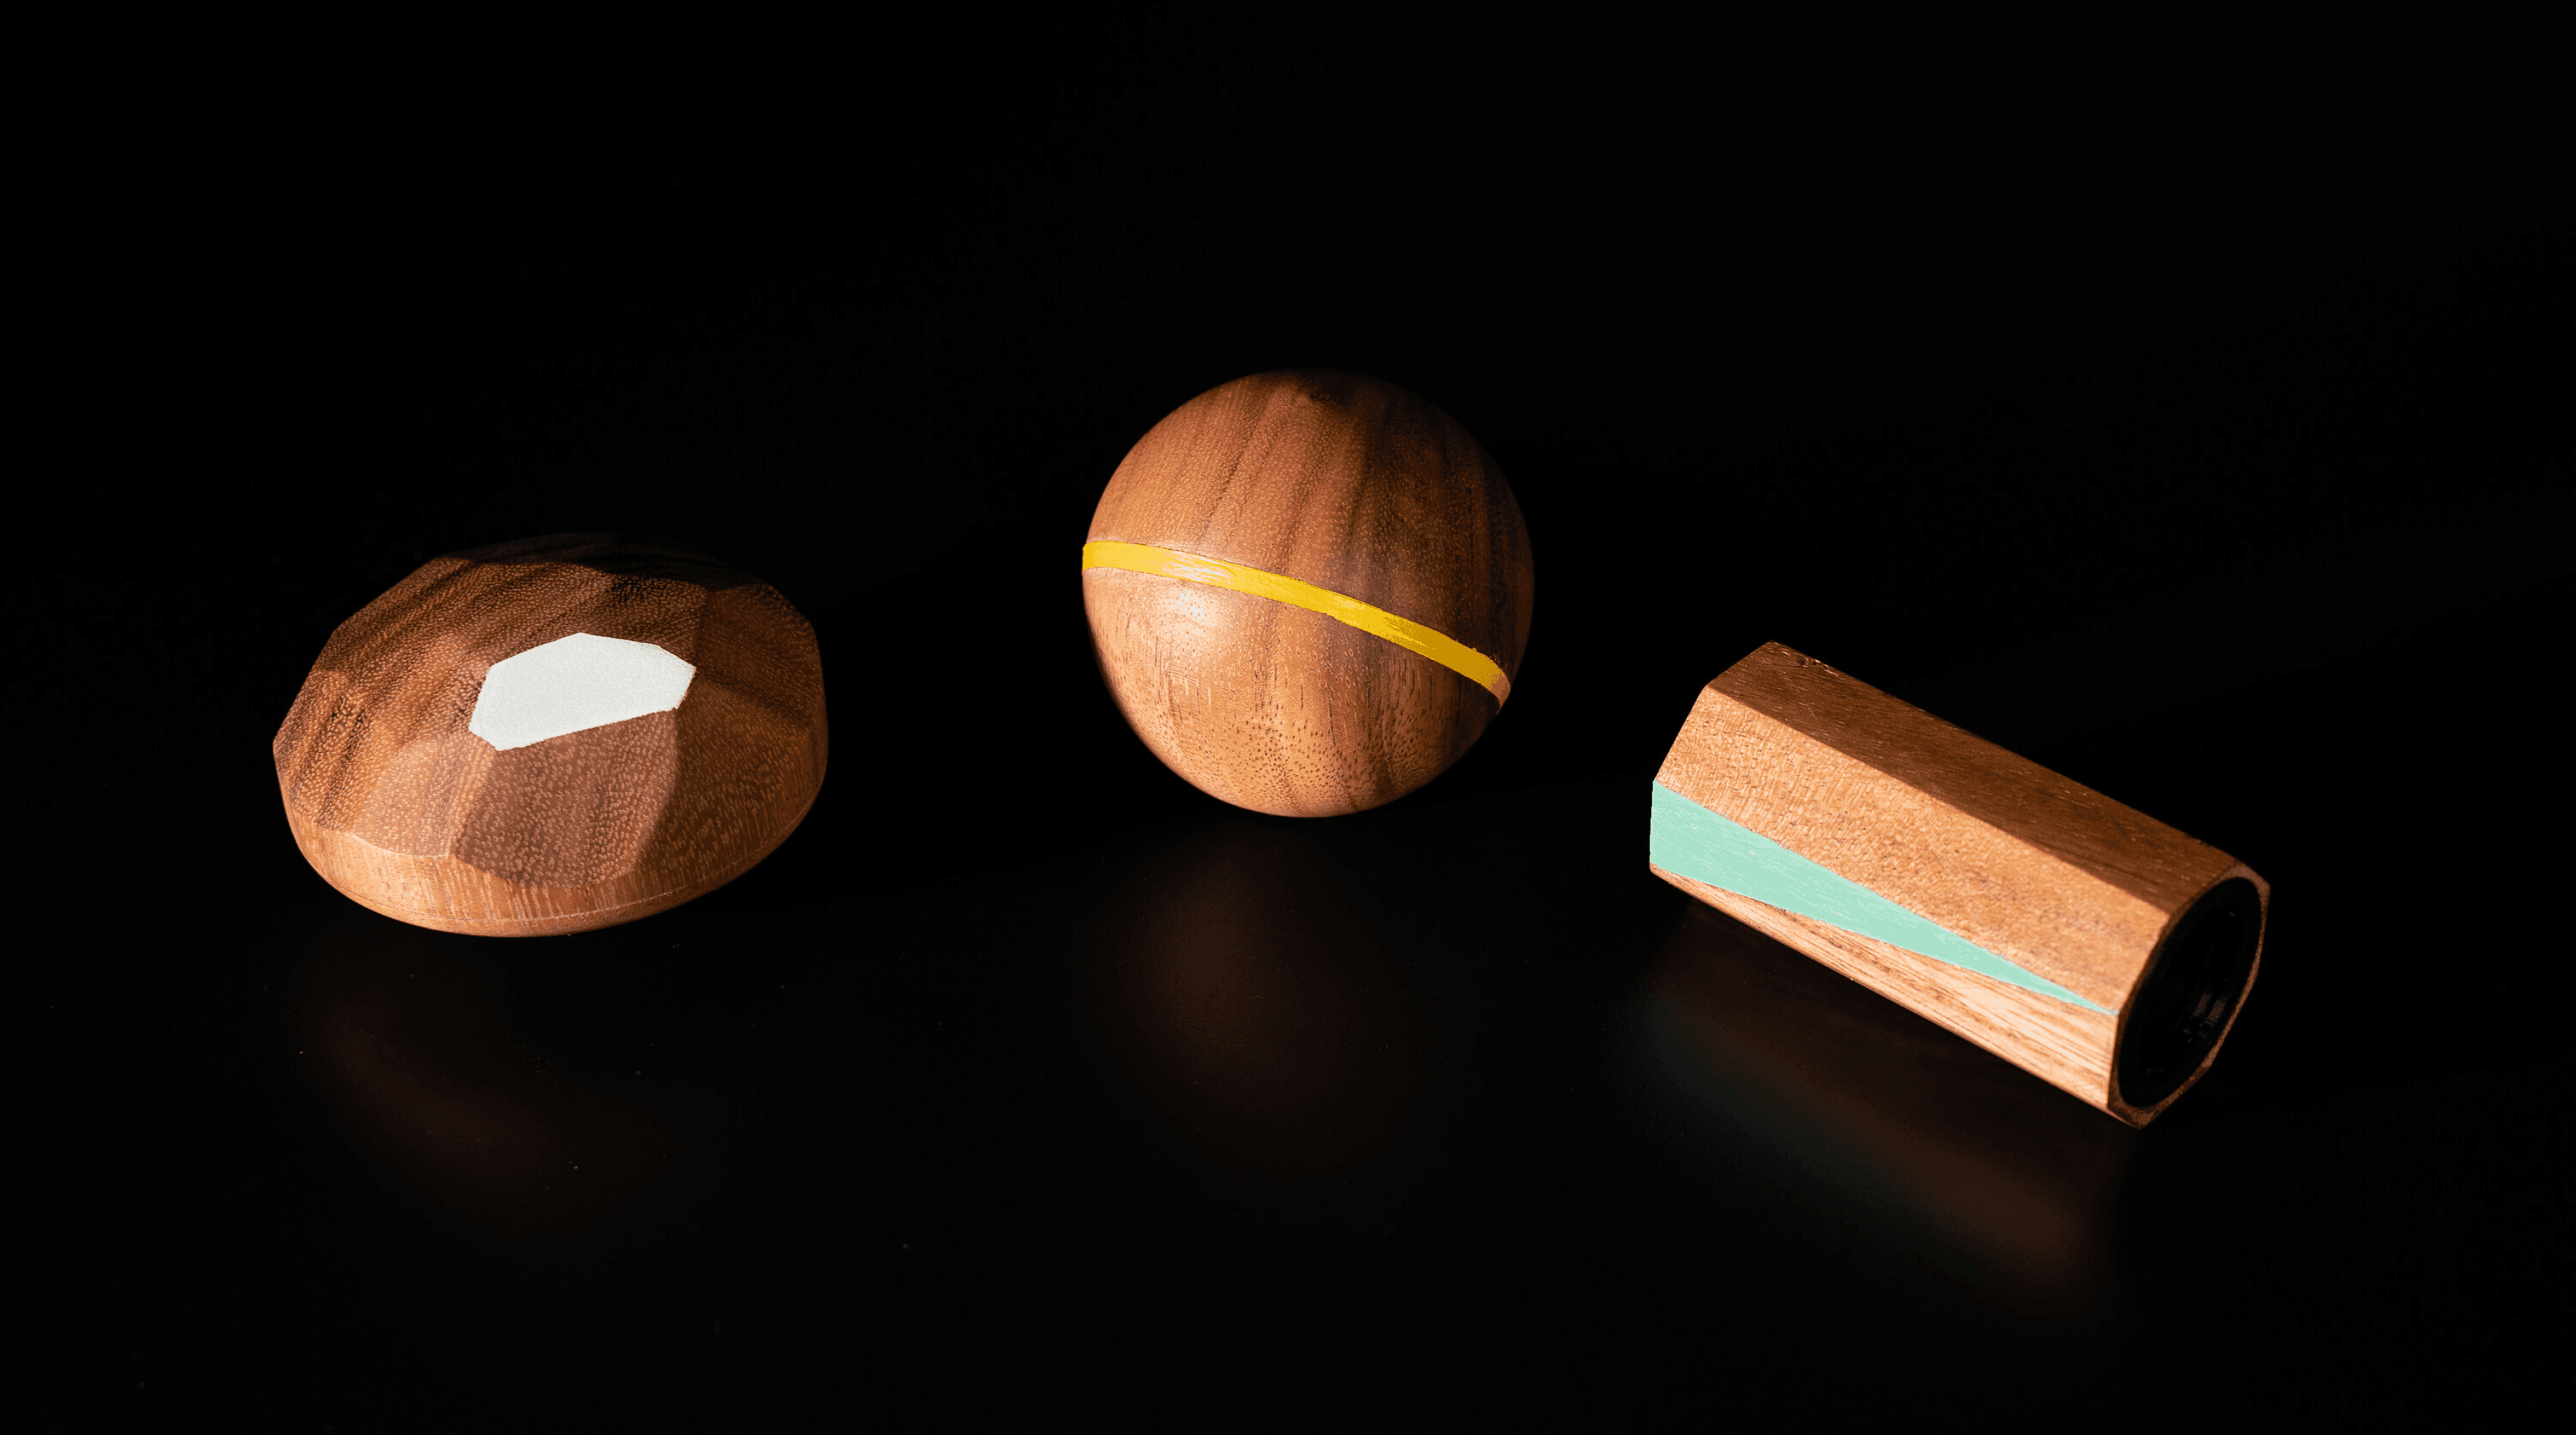
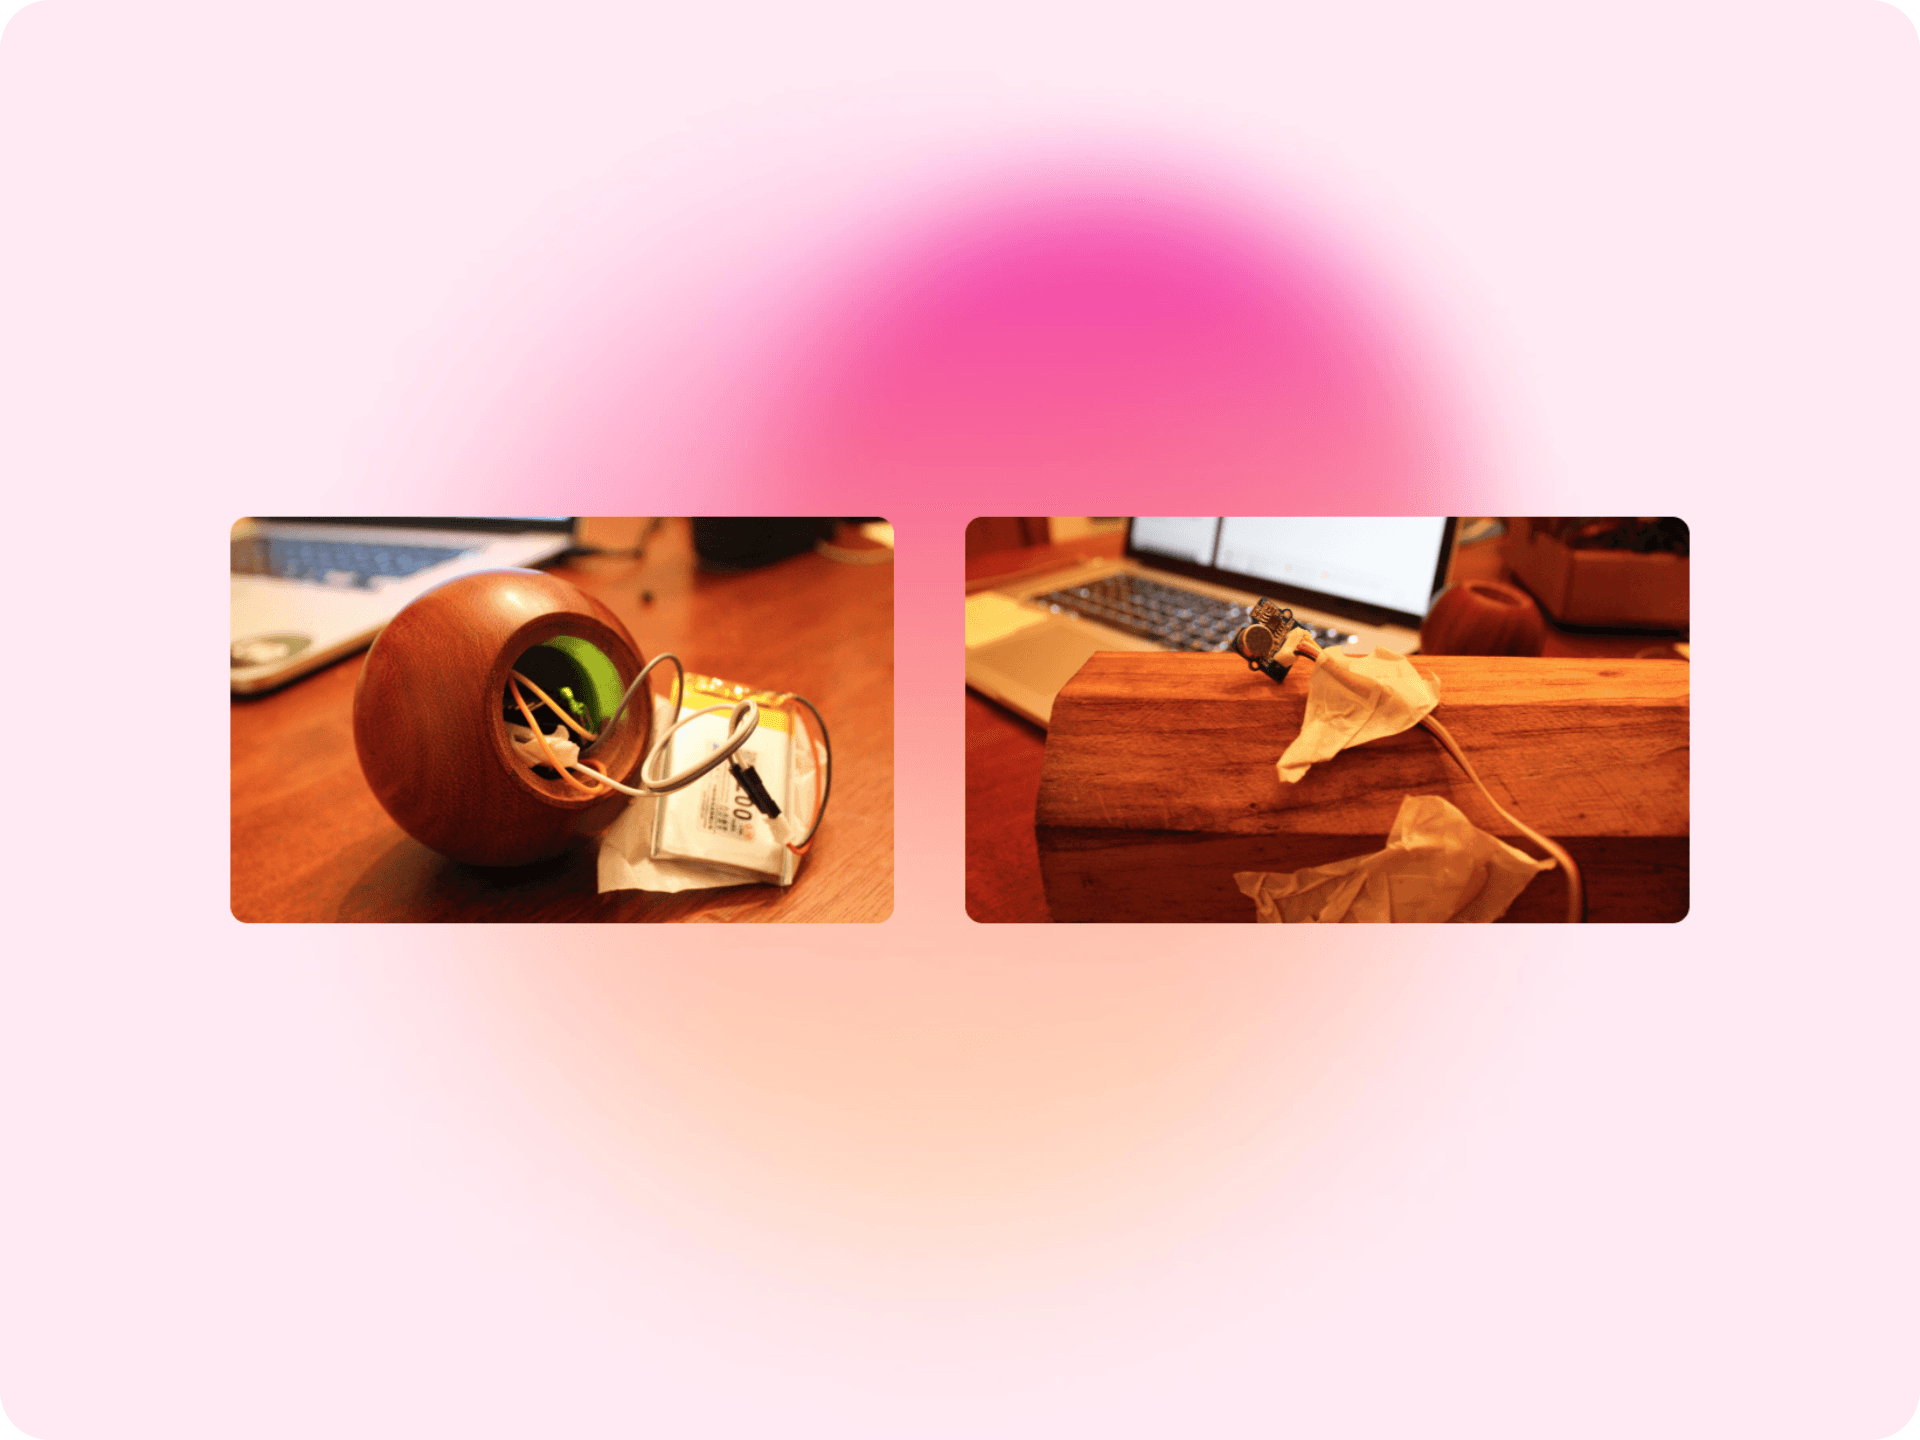
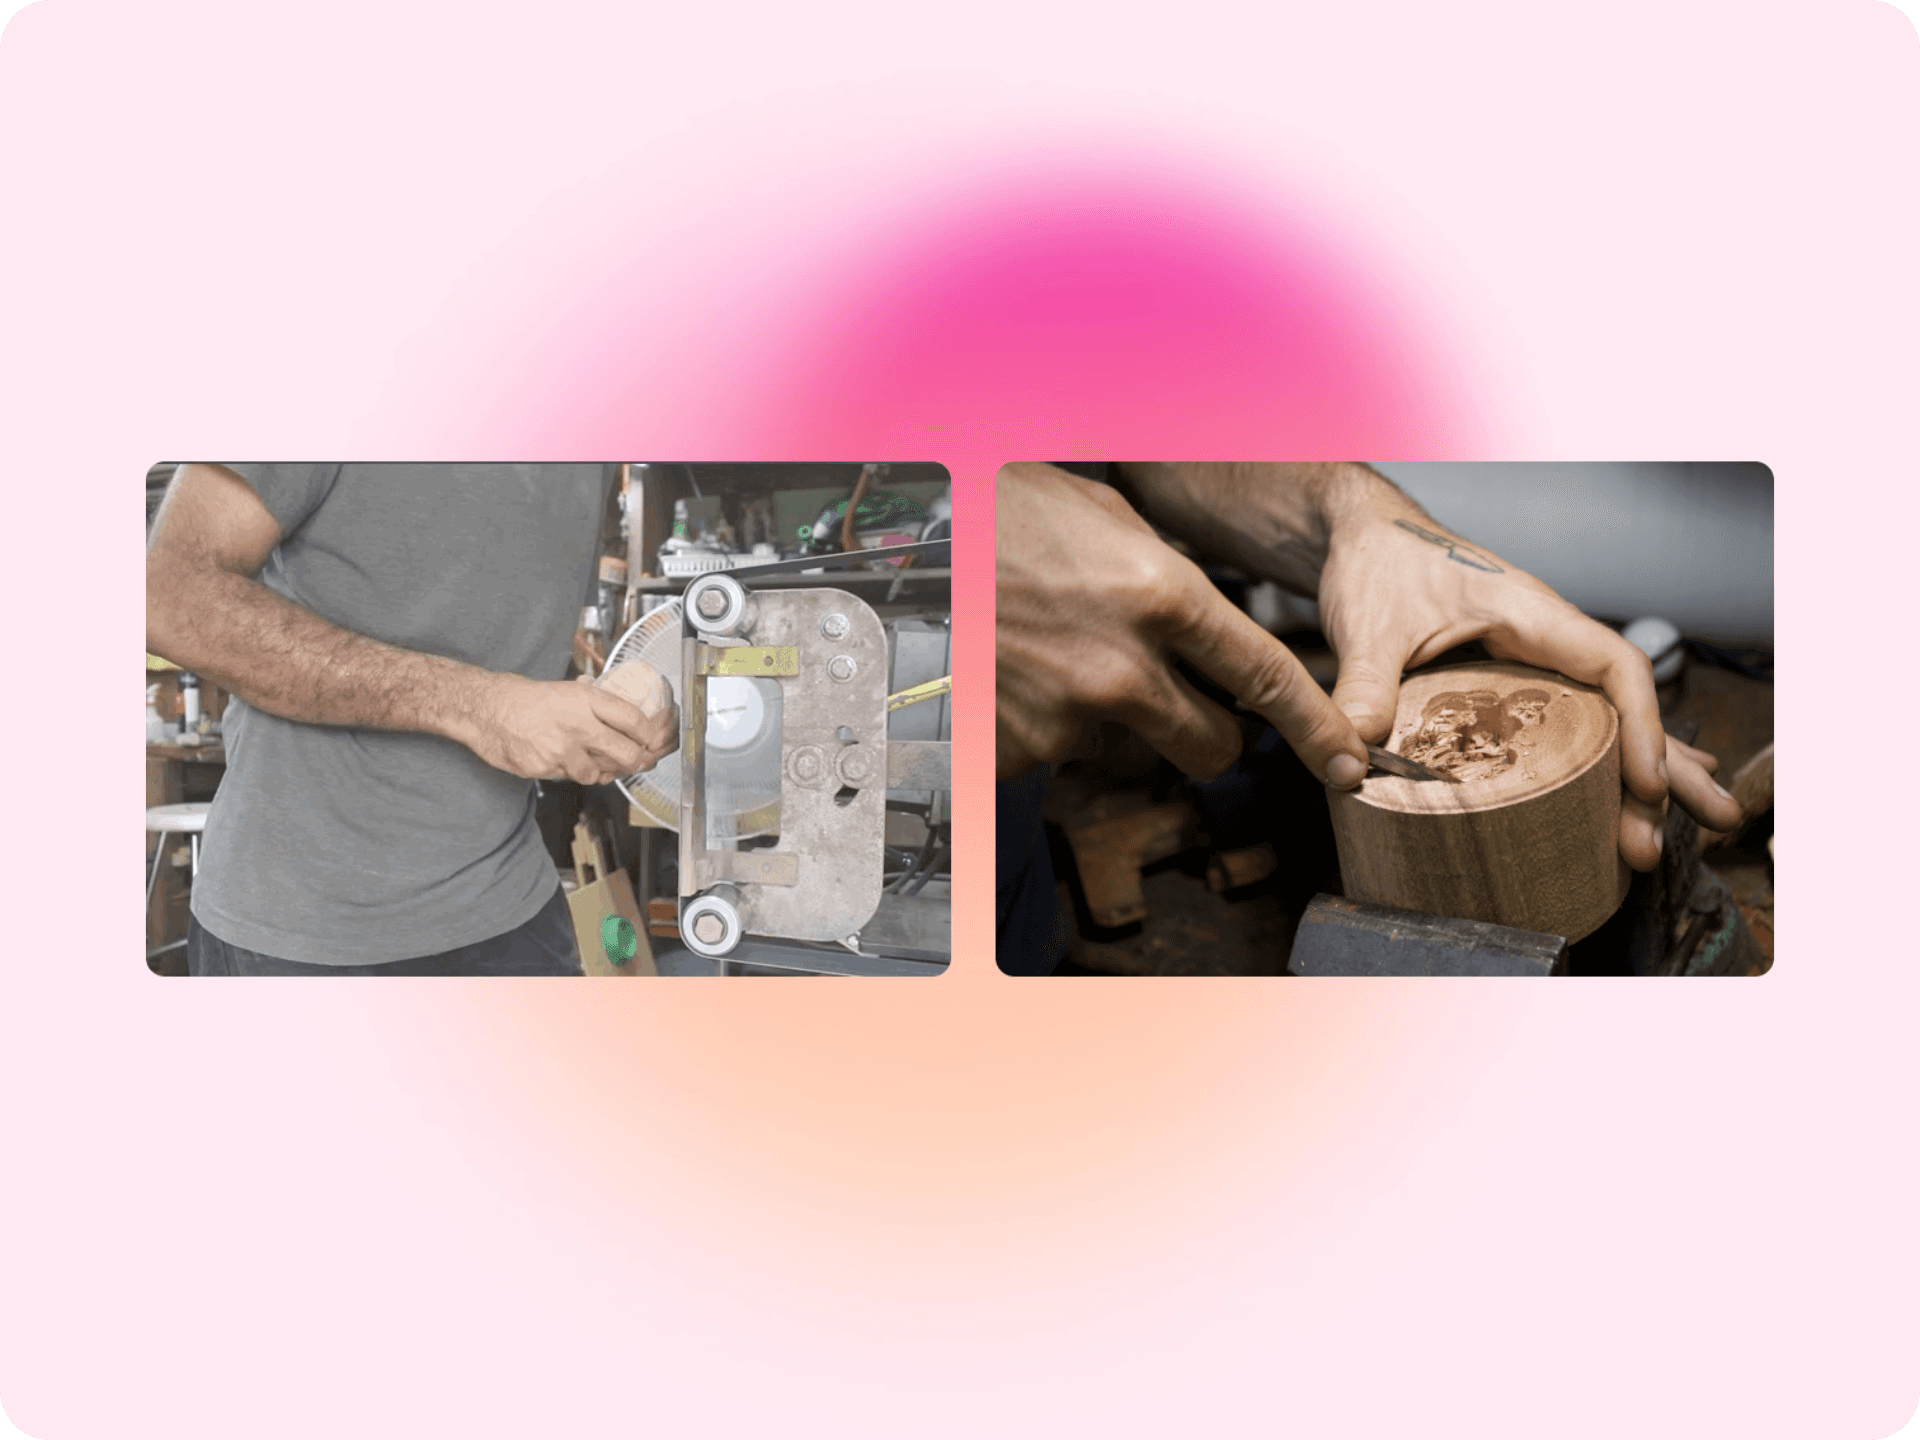
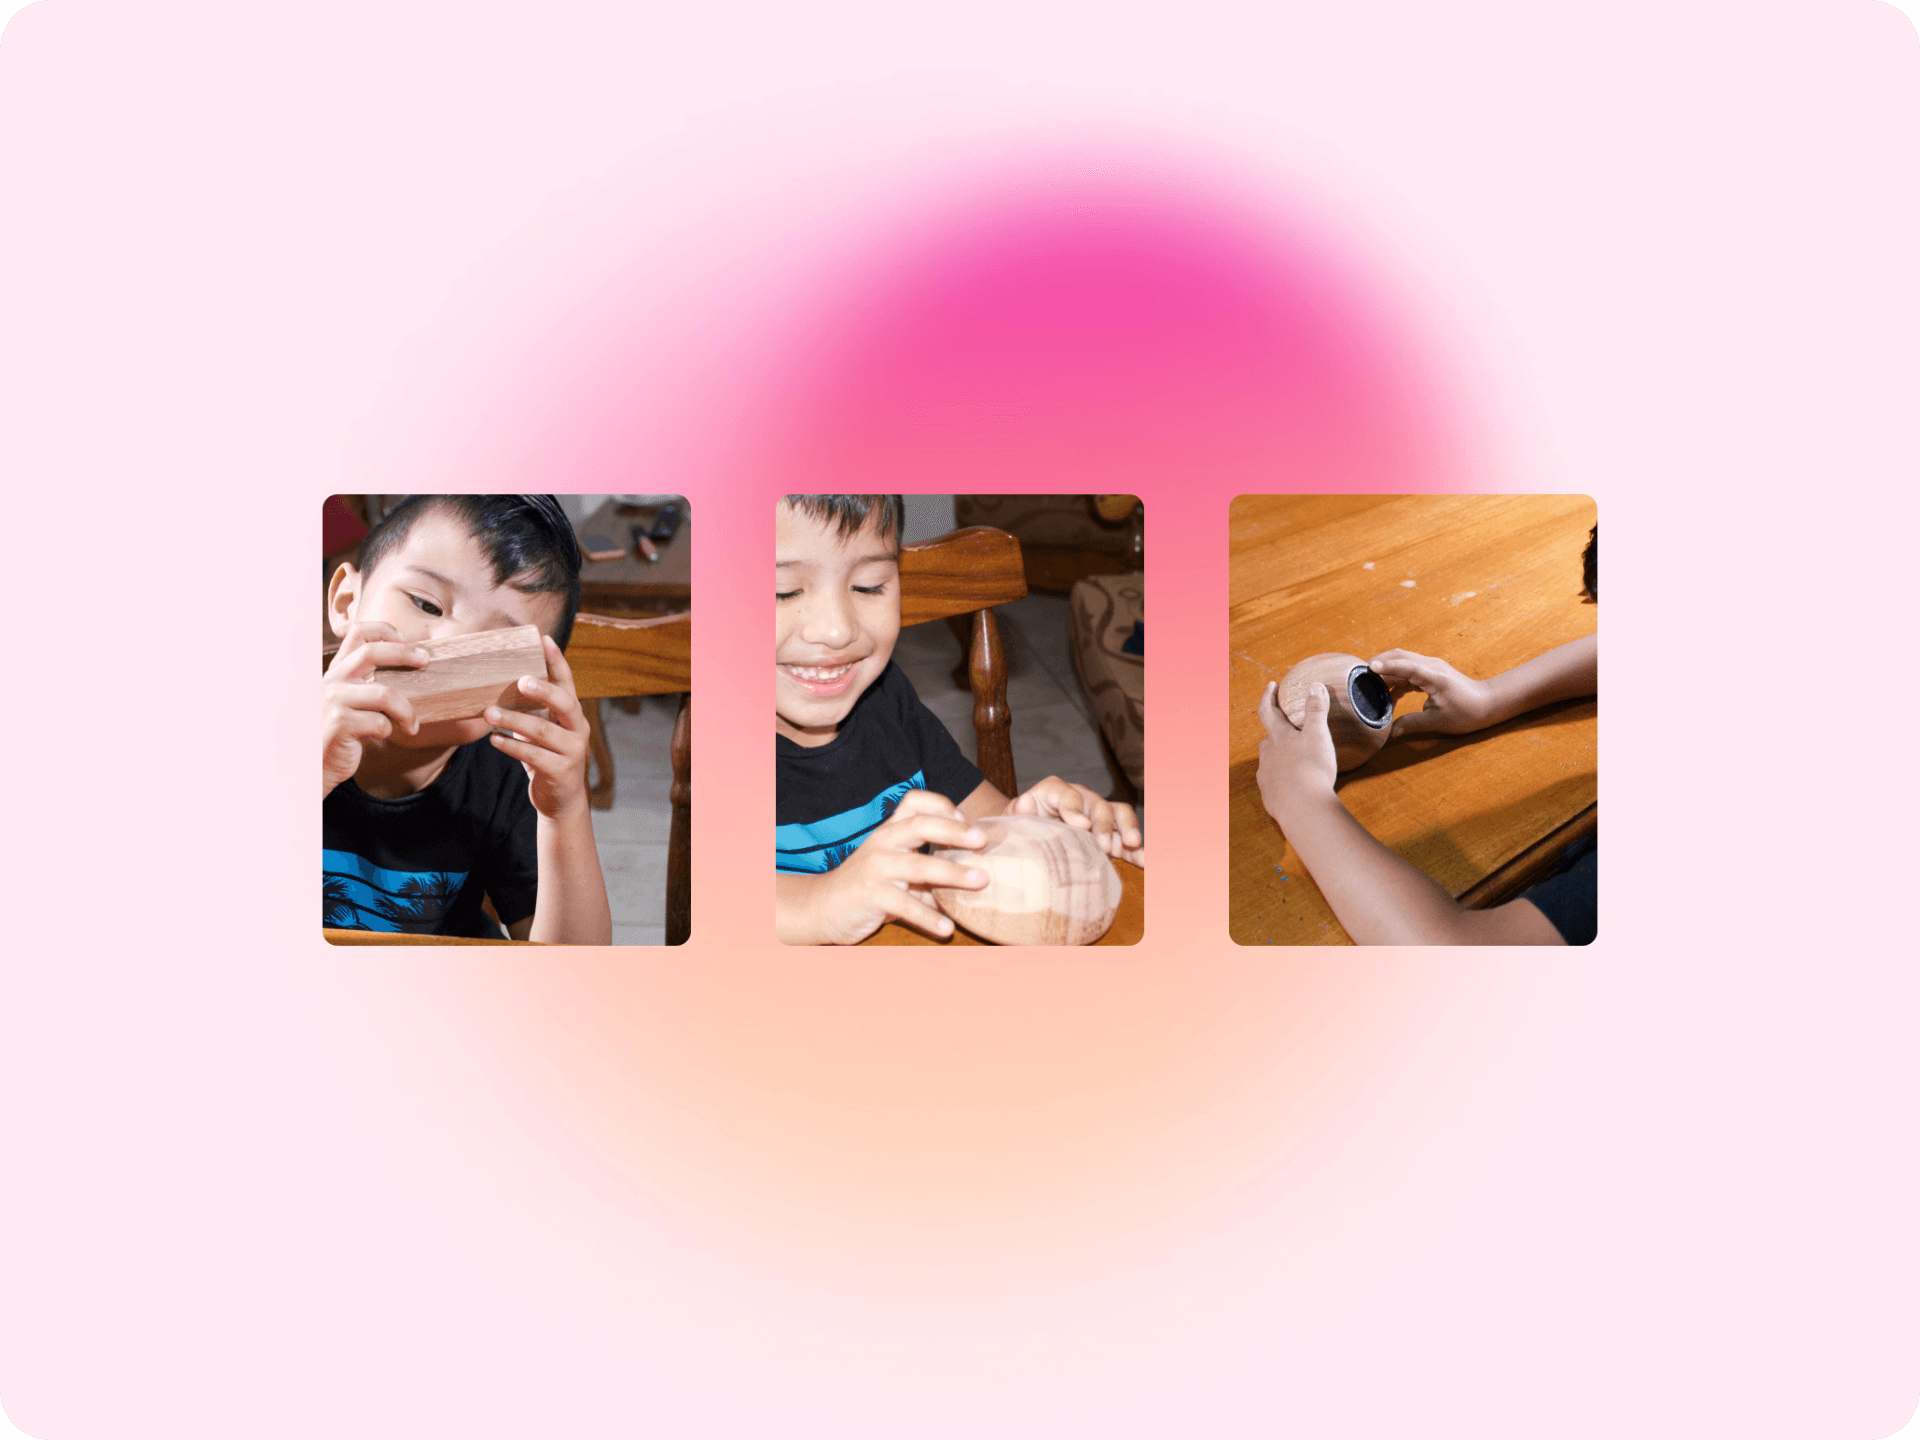
After several failed attempts, I decided to return to basics. I collaborated with a local woodworker and learned how to carve simple shapes out of wood. These wooden prototypes provided the textures and colors that Julian had preferred in the initial tests. The natural feel and durability of wood made it an ideal material for the toy.
Technology Used
Loop is built using an Arduino Nano 33 IOT connected to a p5.js sketch.
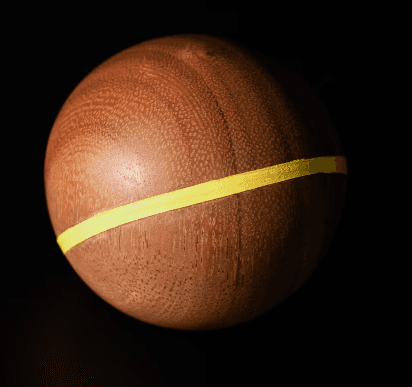
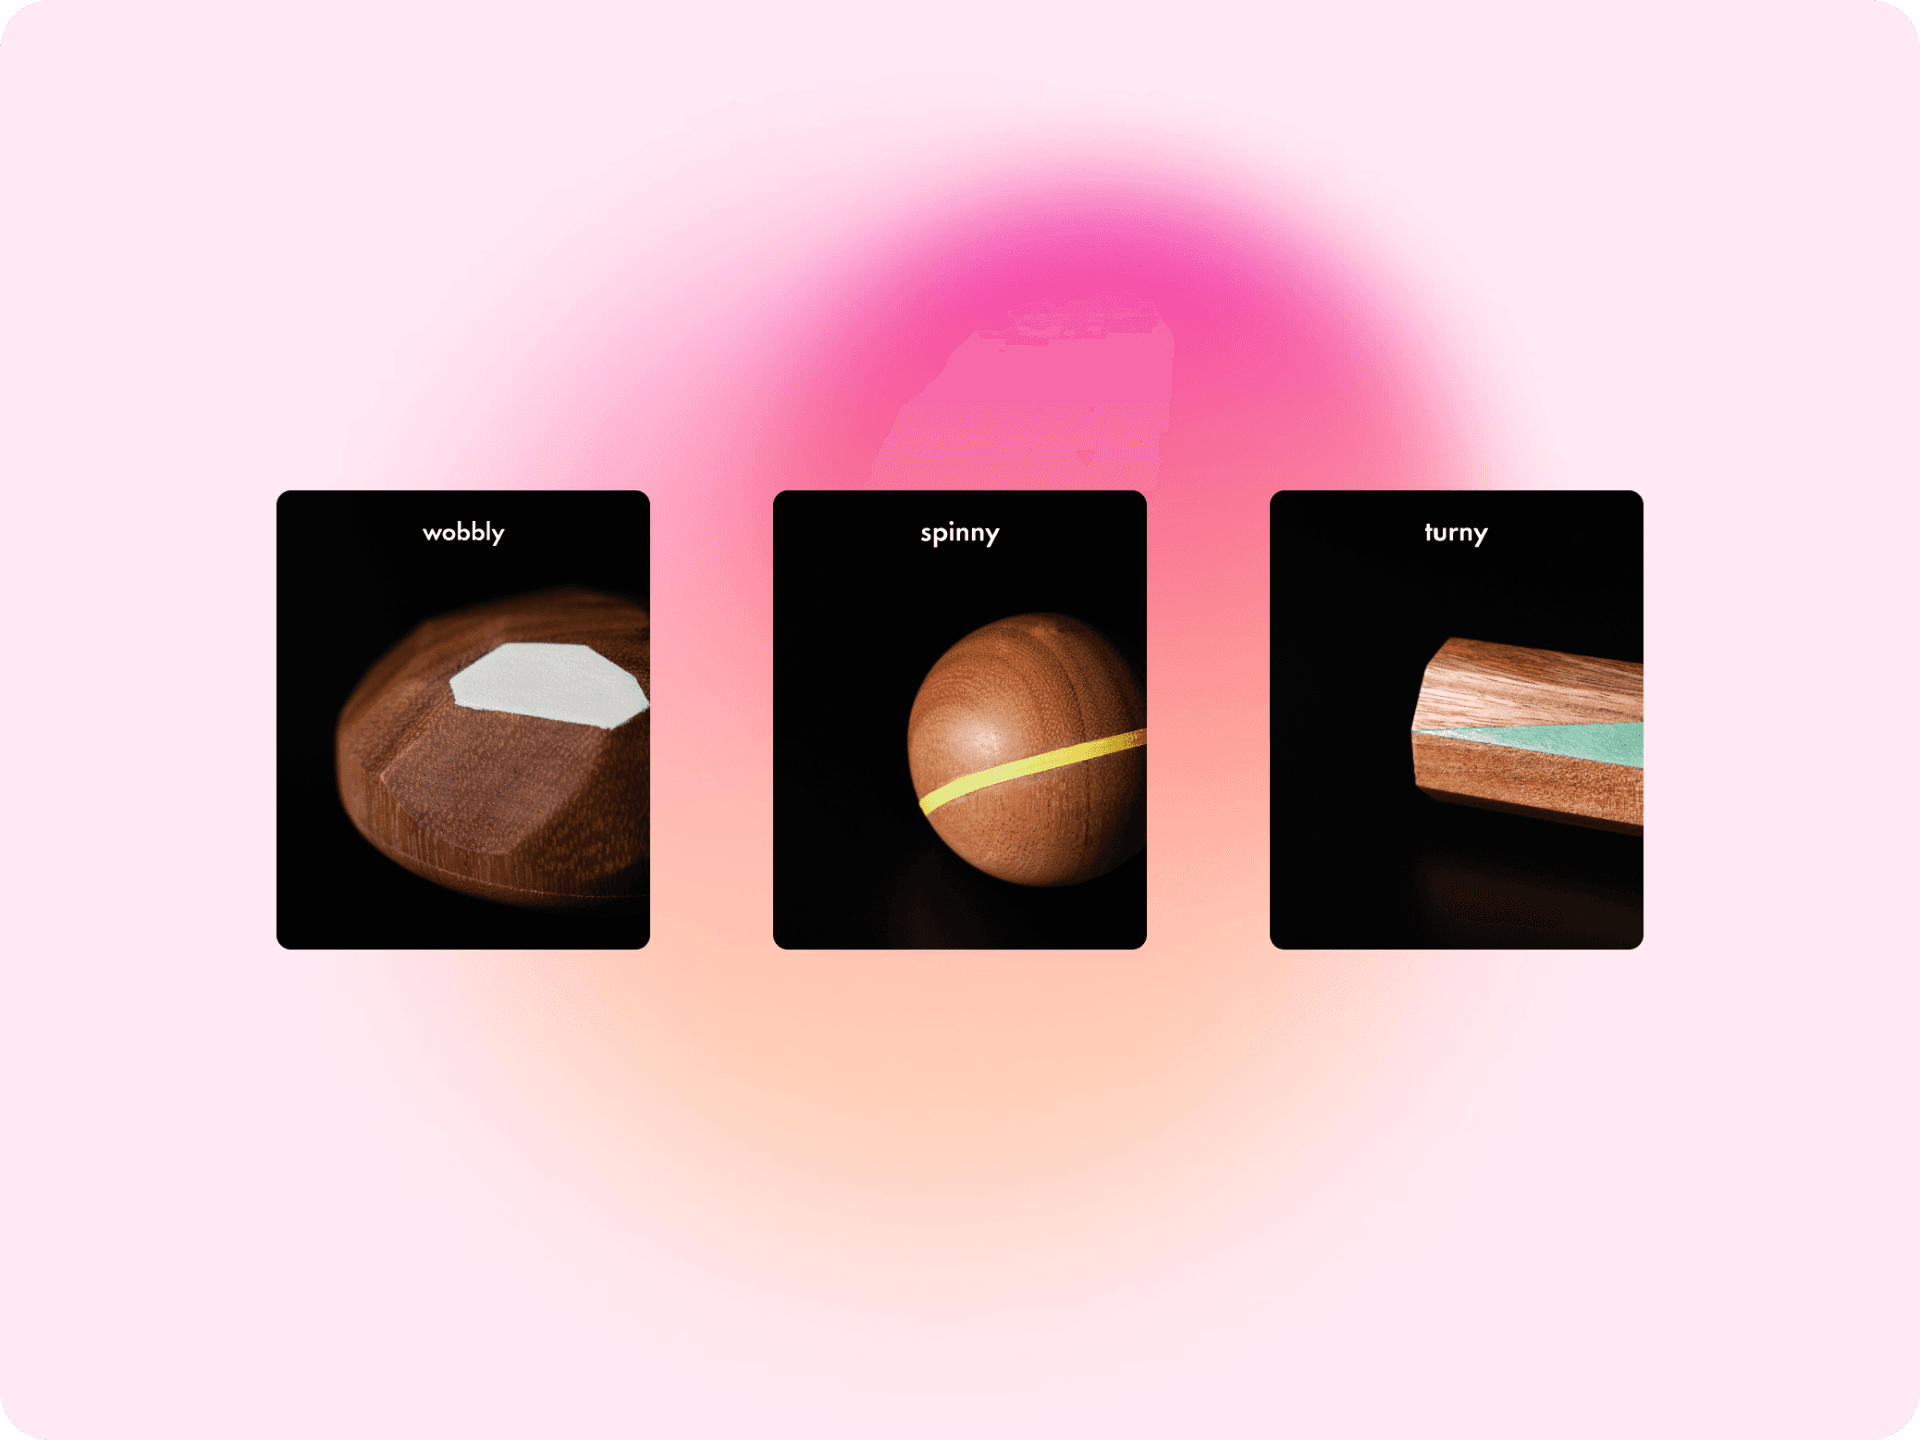
Spinny (the spherical toy) has a Nano's gyroscope connected to a p5.js sketch playing a drum loop. And based on how fast Spinny is spun, the BPM of the drum loop increases.
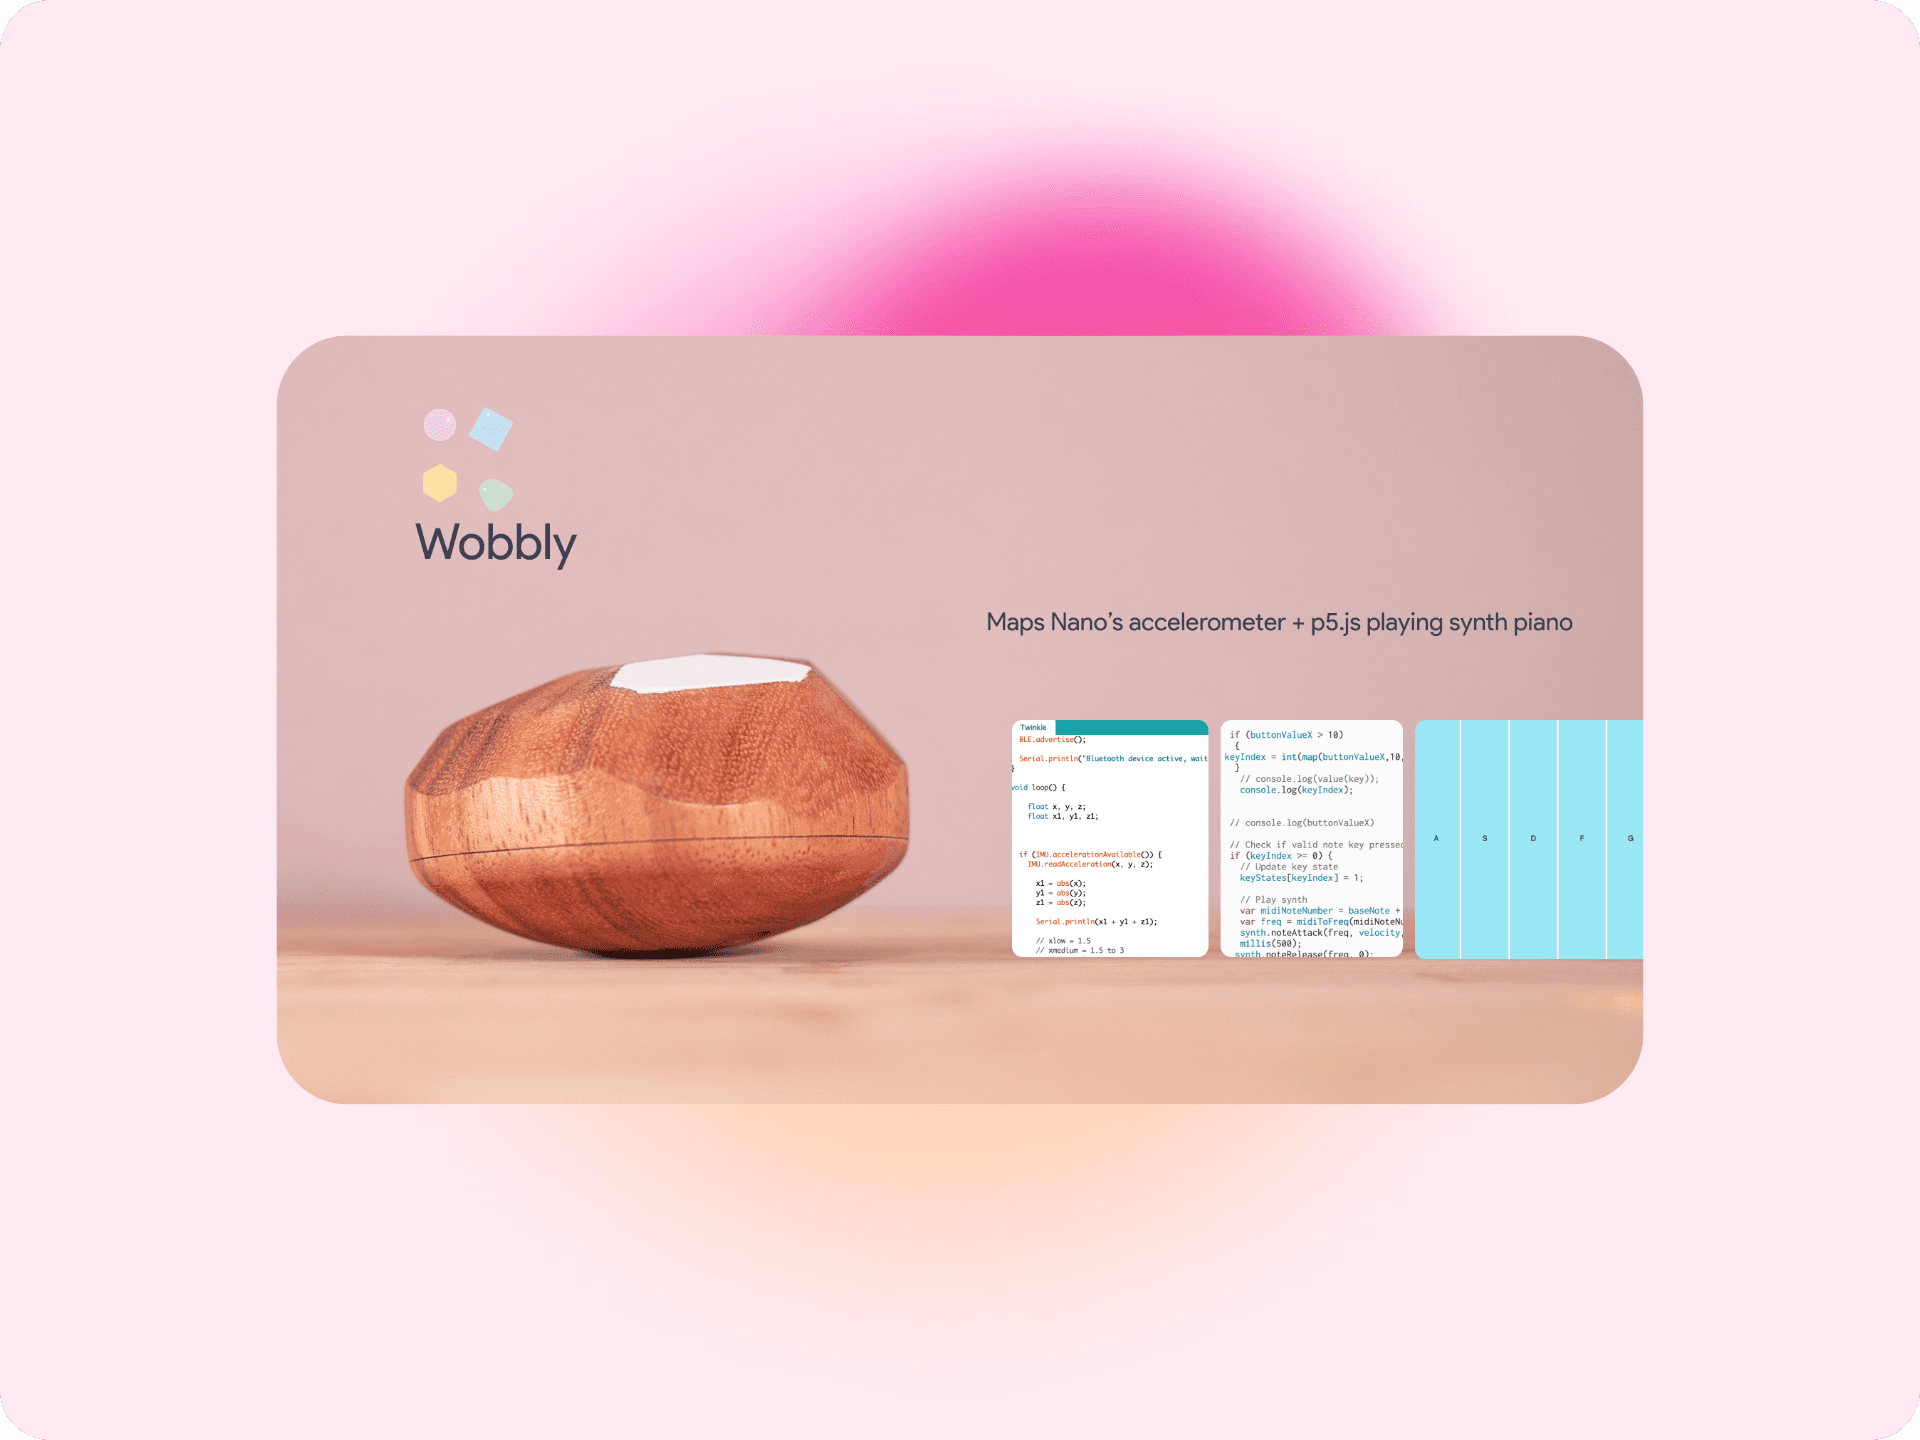
Wobbly (the toy with multiple flat faces) connects a Nano's accelerometer to a p5.js sketch playing a synth piano. When the different sides of Wobbly are touched, it plays different keys of the piano.
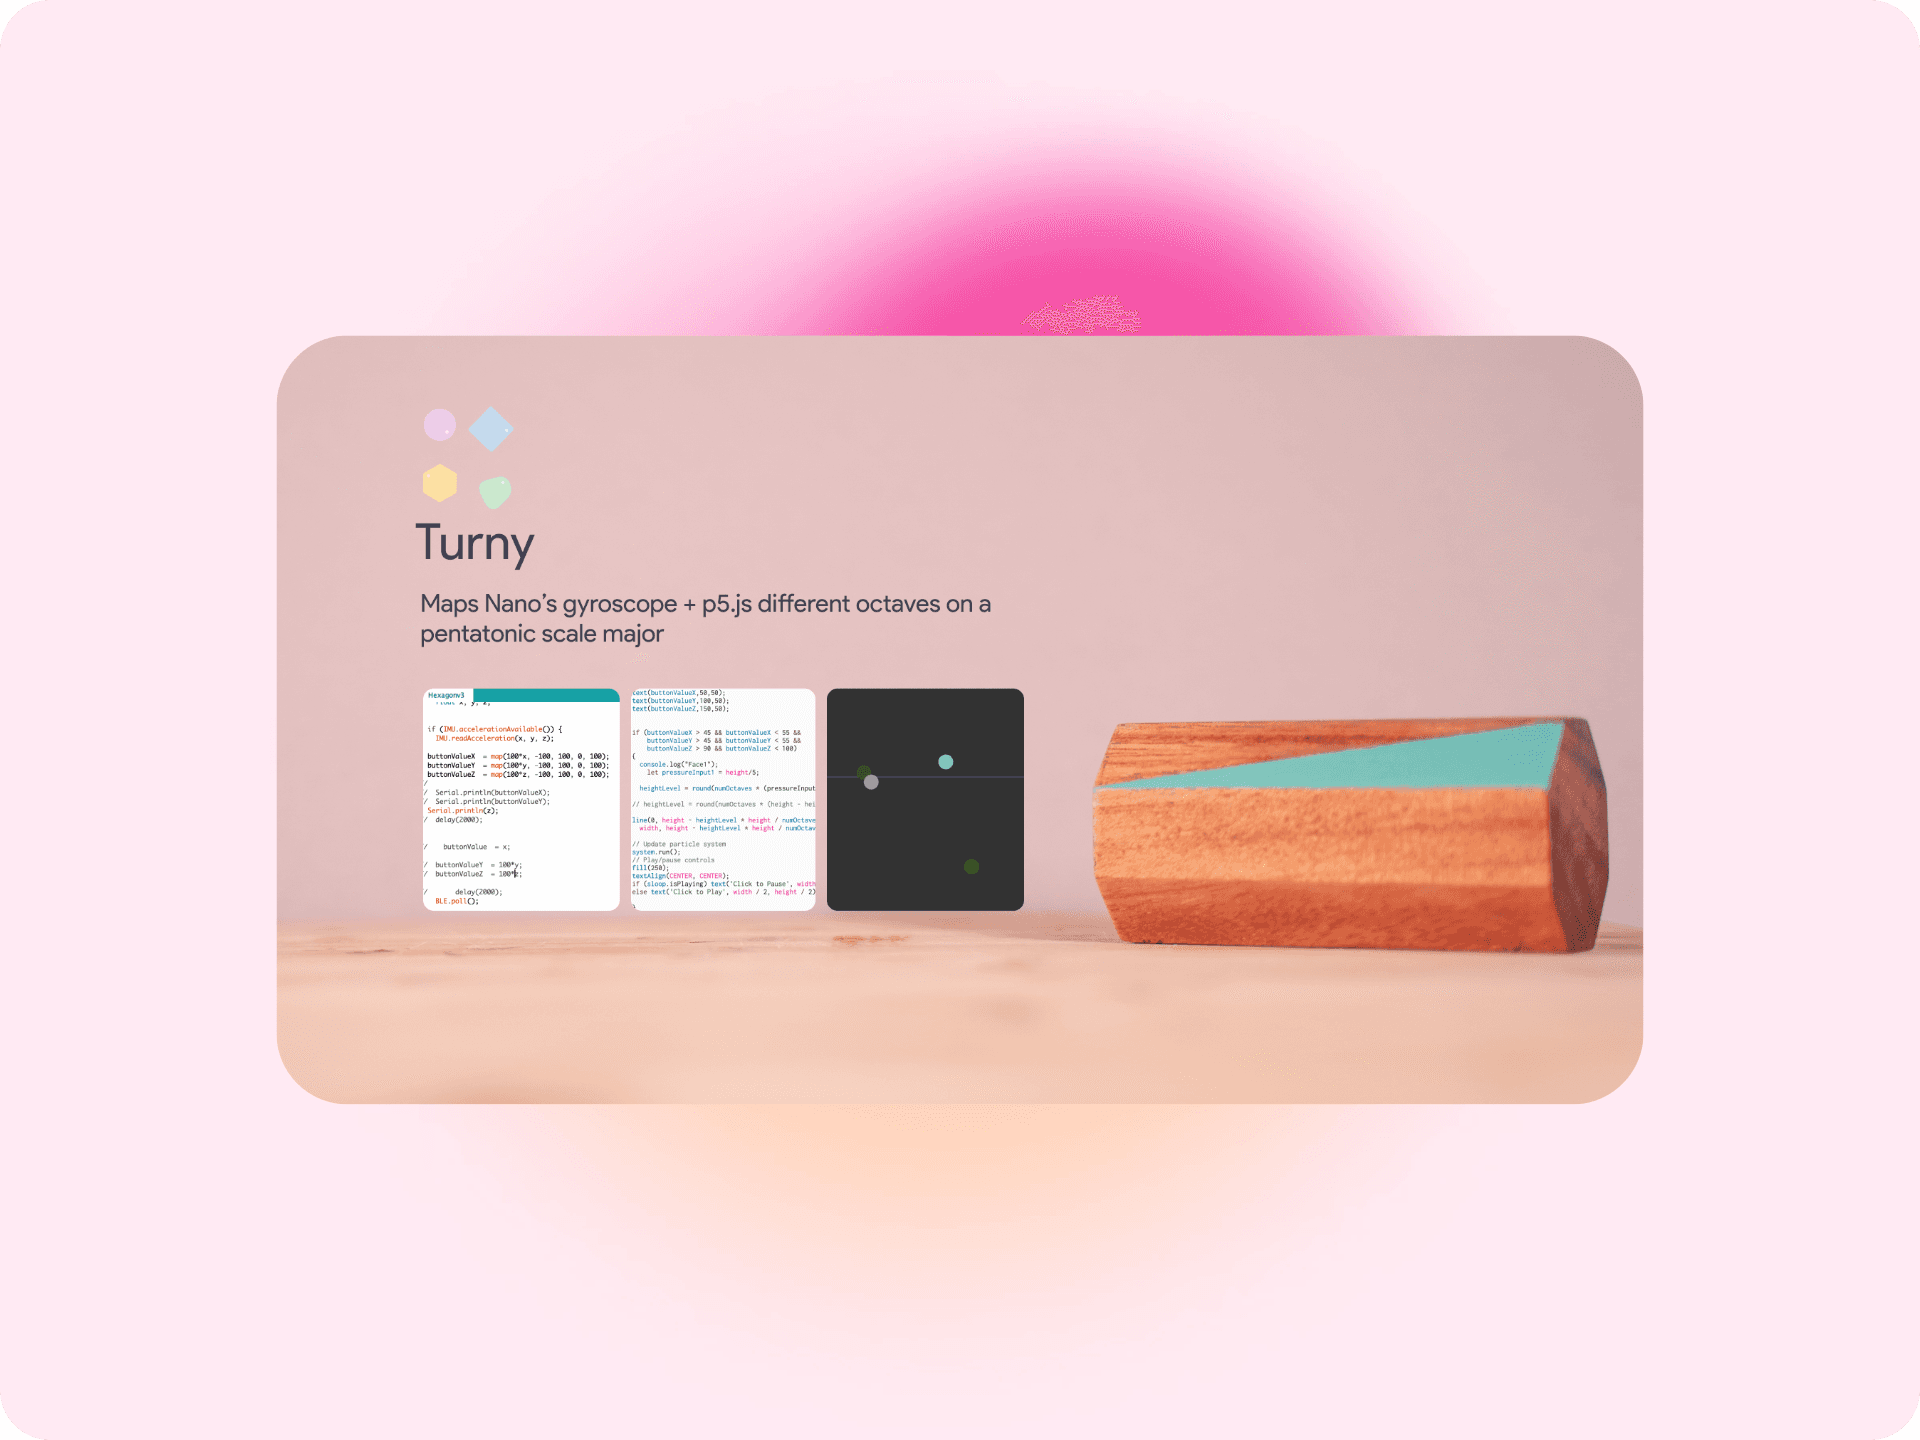
Turny (the hexagonal cylindrical toy) connects a Nano's gyroscope to a guitar played on a major pentatonic scale, which changes octaves based on which side the toy is facing.

Failed Iterations:
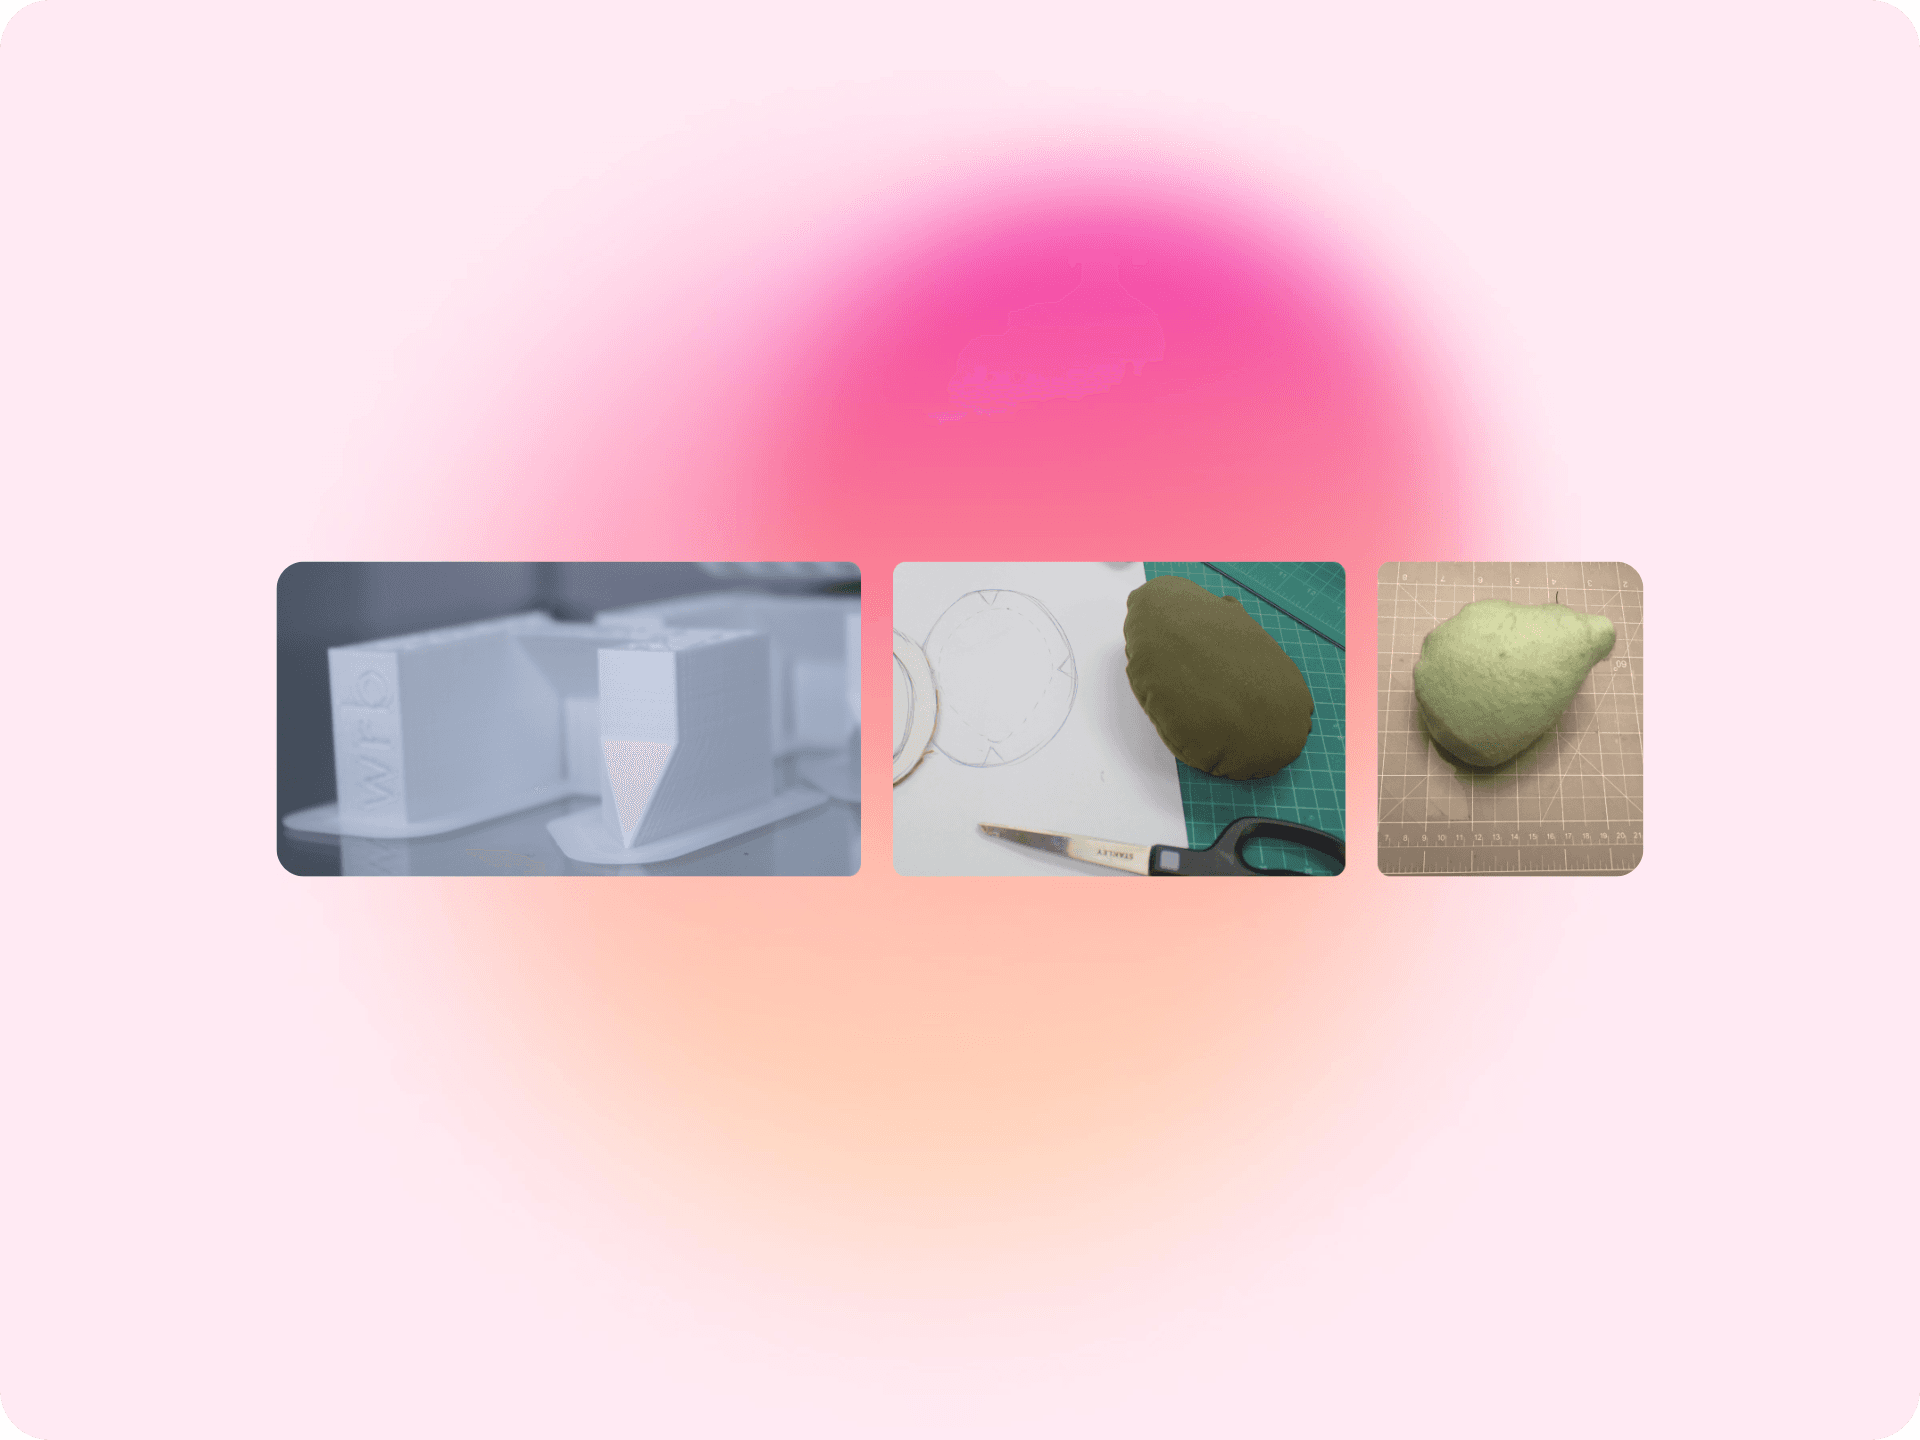
The project was full of learning opportunities, often through failure. For instance, a 3D printed musical puzzle and a plush toy were both discarded after testing because they didn’t meet the engagement or durability standards. These failures were essential in guiding me towards better solutions.
Conclusion
The final design, made from durable wood and inspired by everyday objects, effectively meets the unique sensory needs of children with autism, providing them with a tool that is both engaging and beneficial.
Video Output
Research
The first step in this project was immersing myself in learning about the needs of children with autism. I spoke with parents, musicians, and therapists to gain a well-rounded understanding of the subject. These conversations were instrumental in shaping my approach, providing insights into the textures, sounds, and interaction preferences that would be essential for the toy.
In addition to these interviews, I also spent time reading research papers and books on autism, sensory processing, and child development. This research helped me frame the problem and identify potential solutions that could guide my design process.

Mentorship
I was fortunate to receive mentorship from Bill Verplank, a pioneer in interaction design. His guidance throughout the project was invaluable, particularly in understanding the interplay between music, movement and user interaction. Bill’s experience helped me shape the conceptual foundation of Loop.
In addition, I received crucial advice from Dayn Wilberding, then a Senior Creative Director at Sonos. Dayn shared his expertise in audio, tactility, generative music, and haptics, which played a key role in ensuring that the toy would be both engaging and functional for children with autism.

Playfulness with a therapeutic output
Co-Creation
Co-creation was at the heart of Loop’s development. I started by organizing initial rounds of co-creation sessions to understand which textures, shapes, and sounds would resonate most with children with autism. It became clear early on that the toy needed to be uncomplicated, with a focus on the child's preferences and needs.
In each session, I introduced various prototypes to see how Julian (the participant) interacted with them. These observations were critical as they allowed me to iterate on the designs, either adding complexity or simplifying elements based on the feedback. After multiple rounds of testing, I realized that a musical toy for children with autism works best when it is simple and tailored to each child’s unique needs.


Exploring music softwares
In the early stages, I explored several music software tools like PureData, Max, and Processing for prototype development. However, I quickly realized that I was spending too much time learning the software and not enough time creating the actual music and refining the toy.
This realization led me to switch to p5.js, a simpler and more intuitive tool that allowed me to iterate and test more efficiently.


Prototyping with Everyday Objects
During early prototype testing, I discovered that simple, everyday objects found in my kitchen were more effective at capturing children’s attention than complex shapes. I used items like salt shakers, spoons, and cups to test the interactive elements of the toy. These objects were familiar and provided the right balance of simplicity and engagement.

Iteration & Testing
Initial Iterations:
One of my testing rounds involved introducing a screen as part of the prototype. However, this iteration failed, as the participant (Julian, 5 years old) was more interested in the screen than in interacting with the toy itself. This experience was a turning point that convinced me to avoid screens and focus instead on tactile and auditory interaction.

3D Printing Colorful Toys:
Another iteration involved using 3D printing to create colorful toys. Although these toys looked playful and appealing, they lacked the durability needed for rough play, which is a critical consideration when designing toys for children. This led me to explore more robust materials.

Back to Basics
After several failed attempts, I decided to return to basics. I collaborated with a local woodworker and learned how to carve simple shapes out of wood. These wooden prototypes provided the textures and colors that Julian had preferred in the initial tests. The natural feel and durability of wood made it an ideal material for the toy.


Technology Used
Loop is built using an Arduino Nano 33 IOT connected to a p5.js sketch.
Spinny (the spherical toy) has a Nano's gyroscope connected to a p5.js sketch playing a drum loop. And based on how fast Spinny is spun, the BPM of the drum loop increases.
Wobbly (the toy with multiple flat faces) connects a Nano's accelerometer to a p5.js sketch playing a synth piano. When the different sides of Wobbly are touched, it plays different keys of the piano.
Turny (the hexagonal cylindrical toy) connects a Nano's gyroscope to a guitar played on a major pentatonic scale, which changes octaves based on which side the toy is facing.


Failed Iterations:
The project was full of learning opportunities, often through failure. For instance, a 3D printed musical puzzle and a plush toy were both discarded after testing because they didn’t meet the engagement or durability standards. These failures were essential in guiding me towards better solutions.

Conclusion
The final design, made from durable wood and inspired by everyday objects, effectively meets the unique sensory needs of children with autism, providing them with a tool that is both engaging and beneficial.

Video Output
Research
The first step in this project was immersing myself in learning about the needs of children with autism. I spoke with parents, musicians, and therapists to gain a well-rounded understanding of the subject. These conversations were instrumental in shaping my approach, providing insights into the textures, sounds, and interaction preferences that would be essential for the toy.
In addition to these interviews, I also spent time reading research papers and books on autism, sensory processing, and child development. This research helped me frame the problem and identify potential solutions that could guide my design process.

Mentorship
I was fortunate to receive mentorship from Bill Verplank, a pioneer in interaction design. His guidance throughout the project was invaluable, particularly in understanding the interplay between music, movement and user interaction. Bill’s experience helped me shape the conceptual foundation of Loop.
In addition, I received crucial advice from Dayn Wilberding, then a Senior Creative Director at Sonos. Dayn shared his expertise in audio, tactility, generative music, and haptics, which played a key role in ensuring that the toy would be both engaging and functional for children with autism.

Playfulness with a therapeutic output
Co-Creation
Co-creation was at the heart of Loop’s development. I started by organizing initial rounds of co-creation sessions to understand which textures, shapes, and sounds would resonate most with children with autism. It became clear early on that the toy needed to be uncomplicated, with a focus on the child's preferences and needs.
In each session, I introduced various prototypes to see how Julian (the participant) interacted with them. These observations were critical as they allowed me to iterate on the designs, either adding complexity or simplifying elements based on the feedback. After multiple rounds of testing, I realized that a musical toy for children with autism works best when it is simple and tailored to each child’s unique needs.


Exploring music softwares
In the early stages, I explored several music software tools like PureData, Max, and Processing for prototype development. However, I quickly realized that I was spending too much time learning the software and not enough time creating the actual music and refining the toy.
This realization led me to switch to p5.js, a simpler and more intuitive tool that allowed me to iterate and test more efficiently.


Prototyping with Everyday Objects
During early prototype testing, I discovered that simple, everyday objects found in my kitchen were more effective at capturing children’s attention than complex shapes. I used items like salt shakers, spoons, and cups to test the interactive elements of the toy. These objects were familiar and provided the right balance of simplicity and engagement.

Iteration & Testing
Initial Iterations:
One of my testing rounds involved introducing a screen as part of the prototype. However, this iteration failed, as the participant (Julian, 5 years old) was more interested in the screen than in interacting with the toy itself. This experience was a turning point that convinced me to avoid screens and focus instead on tactile and auditory interaction.

3D Printing Colorful Toys:
Another iteration involved using 3D printing to create colorful toys. Although these toys looked playful and appealing, they lacked the durability needed for rough play, which is a critical consideration when designing toys for children. This led me to explore more robust materials.

Back to Basics
After several failed attempts, I decided to return to basics. I collaborated with a local woodworker and learned how to carve simple shapes out of wood. These wooden prototypes provided the textures and colors that Julian had preferred in the initial tests. The natural feel and durability of wood made it an ideal material for the toy.


Technology Used
Loop is built using an Arduino Nano 33 IOT connected to a p5.js sketch.
Spinny (the spherical toy) has a Nano's gyroscope connected to a p5.js sketch playing a drum loop. And based on how fast Spinny is spun, the BPM of the drum loop increases.
Wobbly (the toy with multiple flat faces) connects a Nano's accelerometer to a p5.js sketch playing a synth piano. When the different sides of Wobbly are touched, it plays different keys of the piano.
Turny (the hexagonal cylindrical toy) connects a Nano's gyroscope to a guitar played on a major pentatonic scale, which changes octaves based on which side the toy is facing.


Failed Iterations:
The project was full of learning opportunities, often through failure. For instance, a 3D printed musical puzzle and a plush toy were both discarded after testing because they didn’t meet the engagement or durability standards. These failures were essential in guiding me towards better solutions.

Conclusion
The final design, made from durable wood and inspired by everyday objects, effectively meets the unique sensory needs of children with autism, providing them with a tool that is both engaging and beneficial.

Video Output
Research
The first step in this project was immersing myself in learning about the needs of children with autism. I spoke with parents, musicians, and therapists to gain a well-rounded understanding of the subject. These conversations were instrumental in shaping my approach, providing insights into the textures, sounds, and interaction preferences that would be essential for the toy.
In addition to these interviews, I also spent time reading research papers and books on autism, sensory processing, and child development. This research helped me frame the problem and identify potential solutions that could guide my design process.

Mentorship
I was fortunate to receive mentorship from Bill Verplank, a pioneer in interaction design. His guidance throughout the project was invaluable, particularly in understanding the interplay between music, movement and user interaction. Bill’s experience helped me shape the conceptual foundation of Loop.
In addition, I received crucial advice from Dayn Wilberding, then a Senior Creative Director at Sonos. Dayn shared his expertise in audio, tactility, generative music, and haptics, which played a key role in ensuring that the toy would be both engaging and functional for children with autism.

Playfulness with a therapeutic output
Co-Creation
Co-creation was at the heart of Loop’s development. I started by organizing initial rounds of co-creation sessions to understand which textures, shapes, and sounds would resonate most with children with autism. It became clear early on that the toy needed to be uncomplicated, with a focus on the child's preferences and needs.
In each session, I introduced various prototypes to see how Julian (the participant) interacted with them. These observations were critical as they allowed me to iterate on the designs, either adding complexity or simplifying elements based on the feedback. After multiple rounds of testing, I realized that a musical toy for children with autism works best when it is simple and tailored to each child’s unique needs.


Exploring music softwares
In the early stages, I explored several music software tools like PureData, Max, and Processing for prototype development. However, I quickly realized that I was spending too much time learning the software and not enough time creating the actual music and refining the toy.
This realization led me to switch to p5.js, a simpler and more intuitive tool that allowed me to iterate and test more efficiently.


Prototyping with Everyday Objects
During early prototype testing, I discovered that simple, everyday objects found in my kitchen were more effective at capturing children’s attention than complex shapes. I used items like salt shakers, spoons, and cups to test the interactive elements of the toy. These objects were familiar and provided the right balance of simplicity and engagement.

Iteration & Testing
Initial Iterations:
One of my testing rounds involved introducing a screen as part of the prototype. However, this iteration failed, as the participant (Julian, 5 years old) was more interested in the screen than in interacting with the toy itself. This experience was a turning point that convinced me to avoid screens and focus instead on tactile and auditory interaction.

3D Printing Colorful Toys:
Another iteration involved using 3D printing to create colorful toys. Although these toys looked playful and appealing, they lacked the durability needed for rough play, which is a critical consideration when designing toys for children. This led me to explore more robust materials.

Back to Basics
After several failed attempts, I decided to return to basics. I collaborated with a local woodworker and learned how to carve simple shapes out of wood. These wooden prototypes provided the textures and colors that Julian had preferred in the initial tests. The natural feel and durability of wood made it an ideal material for the toy.


Technology Used
Loop is built using an Arduino Nano 33 IOT connected to a p5.js sketch.
Spinny (the spherical toy) has a Nano's gyroscope connected to a p5.js sketch playing a drum loop. And based on how fast Spinny is spun, the BPM of the drum loop increases.
Wobbly (the toy with multiple flat faces) connects a Nano's accelerometer to a p5.js sketch playing a synth piano. When the different sides of Wobbly are touched, it plays different keys of the piano.
Turny (the hexagonal cylindrical toy) connects a Nano's gyroscope to a guitar played on a major pentatonic scale, which changes octaves based on which side the toy is facing.


Failed Iterations:
The project was full of learning opportunities, often through failure. For instance, a 3D printed musical puzzle and a plush toy were both discarded after testing because they didn’t meet the engagement or durability standards. These failures were essential in guiding me towards better solutions.

Conclusion
The final design, made from durable wood and inspired by everyday objects, effectively meets the unique sensory needs of children with autism, providing them with a tool that is both engaging and beneficial.

Video Output


